2014 Ranger Tugs R-27 for Sale
$141,500

Navigating the Website
and
Contact Information
This website was set up to provide information and pictures of a 2014 Ranger Tugs R-27 that we have for sale. We felt the best way to do that was to build a “simple website”. We set up the following sections:
Introduction
Specifications
Navigation and Electronics
Engine and Drive Train
Miscellaneous Non-Engine Repairs
Batteries, Charging System, Inverters, and 110-volt System
Miscellaneous Mechanical Upgrades
Main Cabin
Galley
Refrigeration
Fresh Water System
Cockpit and Swim Platform
Portland Pudgy
Brickerton Portable Aluminum Bikes
Trailer
Additional Items Included in Sale
Manuals and Information
Each section outlines its topic in detail, followed by pictures with explanations of what is depicted in each. There are no pictures in the Specifications section. It is necessary to start with the first section, Introduction, and scroll through each section until you have reviewed everything. Most sites do not allow you to add an explanation of what is in a picture, and I think you will agree that having that information is very helpful.
We did not want to make it too complicated to get ahold of us. We live in Port Charlotte, Florida, and the R-27 is on a covered lift in a canal behind our house. For any inquiries, please call or text Bob at:
Cell Phone: 941-380-0628
.
INTRODUCTION
We purchased the boat new in October 2013 and, due to age and medical issues, are transitioning away from overnight cruising and considering a pontoon boat. Therefore, we are not saving anything on the boat for a newer, larger boat, and everything is included, as shown on the equipment list. The boat is configured for one couple to cruise. We always joked that the boat slept 2, fed four, and cocktailed 8.
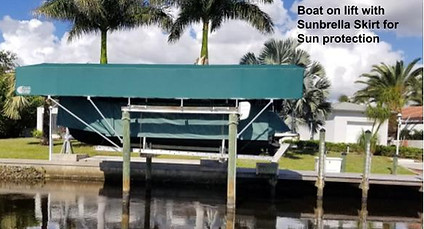
The boat is in SW Florida and has been stored on a covered lift since purchase. It also has Sunbrella curtains that cover the dark green hull from the sun. We have put 650 hours on the engine, most of it spent traveling extensively from Tarpon Springs in the north to Everglades City in the south, across the State of Florida through Lake Okeechobee to Stuart, Florida, and the east coast intracoastal waterway. We also put the boat on its tandem trailer, which is included in the sale, and pulled it to the Minneapolis-St Paul area, put it in the Mississippi River, and traveled to La Crosse, Wisconsin, and back for a total of over 400 miles. En route, we stayed in RV parks as if we were pulling a 5th wheel. Everything worked except the air conditioning because the boat was not in the water. We had more road trips planned, but our health gave out. Hopefully, the next owner can make many of those trips, and we have many ideas for them.
Prior to buying the Ranger Tugs R-27, we had a 25 Foot Bayliner Classic from 2002 until just before getting delivery of the R-27 in October 2013. It was a marina boat with an air conditioner that fit in the hatch. Like the R-27, the Bayliner had a trailer, and we did the Kentucky Lakes on the Tennessee and Cumberland rivers for a two-week trip. We also towed it to the Chesapeake Bay for another 2-week adventure. Before retiring, the plan was to get a large Catamaran Sailboat and do some ocean cruising. Finally, in 2006, we found an older 35-foot Island Packet Catamaran that fit the bill. The Catamaran drafted 3 feet, which is important in our part of Florida. It also had a large salon, 2 engines, a large generator, and 2 A/C units. There were two heads with showers and one queen-size bed in each of the forward staterooms in the two hulls. It was an extremely comfortable boat, but the required hull maintenance became too much of a hassle. We sold the Catamaran in April 2013 and had the R-27 delivered in October 2013. We were in a sailboat club, and I was the 2nd of 10 friends to switch from sailboats to trawlers over the next 4 years. We all stayed in the sailboat club, as it was the only local club that planned two 3-week cruises a year, one in the spring and one in the fall, one headed north and one headed south. We live just about in the middle of SW Florida. We had a dinghy on the catamaran as we did on R-27 and anchored out 75% of the time.
After selling the Catamaran and Bayliner in early 2013, we wanted an inboard, small trawler with a shallow draft, one we could pull on a trailer, that could accommodate a small dinghy, and that we could keep out of the water on our covered lift. We also wanted our boat to be a “fast trawler”. All of our trawler friends travel at 8 to 10 knots, and we can cruise all day at 17 knots, with a top speed of 21 knots or almost 25 mph, which occasionally comes in handy. At 7 knots, the R-27 gets 6 NMG but only 2.1 NMG at all speeds from 13 knots to 21 knots. We got spoiled with the comfort on the catamaran, so it had to be well-equipped. We ordered with every available option. The R-27 was just what we were looking for. It had a shallow 2’2” draft, a generator, an air conditioner, a head with a shower, a large V-birth, easy to put on and off a trailer, and excellent maneuverability due to bow and stern thrusters. It also came with a Garmin Suite of electronics, including a chartplotter, radar, sonar, autopilot, and VHF. Numerous other additions were made and will be outlined in different sections of this website.
The boat was on the lift during Hurricane Ian in September 2022. It was strapped down to the lift and appeared to weather the storm with no damage. Ian was a slow-moving hurricane, and the R-27 and our house were exposed to sustained winds of 140 mph for over 10 hours, with 12 inches of rain. Ian hit at 7 PM on September 28th and did not depart until 5 AM the next morning. We were at my brother's two-story house about 10 miles inland during the storm, and when we arrived home at 8 AM the next day, a 37-foot sailboat had been pushed up against our boat lift but had not hit our boat. We had to get the Sailboat moved before the rising tide pushed it into the bottom of our boat. Miraculously, the sailboat owner showed up, and we managed to move the boat around our lift and tie it to our dock, avoiding damage to the R-27. The Bimini and all canvas had been removed from the boat prior to the hurricane. The cover over the boat lift is designed to withstand 80 MPH winds, but not 140 MPH winds. The vinyl cover protecting the boat blew off, exposing it to the wind and rain.
I inspected the outside of the boat, and aside from a cover over the swim platform ladder that blew away, there was no damage. I also went into the cabin to check for water damage or leaks, and found none. I even checked the electrical panel, and the batteries were at their normal level. Never in my wildest imagination did I suspect that water had somehow gotten into the engine compartment or the bilge area in the boat. Once we got the sailboat away from the lift, around the boat, and tied it to the dock, we had to give all our attention to the house, as the boat appeared relatively untouched.
We spent the next two months trying to get quotes from roofing companies, pool repair companies, screened lanai contractors, paint contractors, ceiling drywall contractors, and numerous other repair professionals. Sometime in early November 2022, I went to check something in the engine compartment and found 15 inches of fresh water in the bilge, from the bow thruster to the stern thruster. Needless to say, I was shocked. I immediately tried to manually start the bilge pumps, but neither worked. After the fact, we realized that the wind and rain that came from the south blew across the canal where the boat was on the lift. The area across the canal was a forested state park, and the boat's cockpit was inundated with rain and debris during Hurricane Ian. The scuppers in the cockpit were blocked by debris, and water flowed into the engine compartment around the access hatch. I got my one-half HP Jabsco pump and pumped all the water out of the bilge. The water in the bilge was all fresh rainwater, but I still immediately rinsed off the engine and bilge below the waterline that had formed. The water covered the engine's alternator and starter, but remained below the engine oil dipstick. The next day, I pumped out the engine oil, changed the filter, and refilled it with new oil. There was no water in the oil, but I knew that wouldn't be the case with the transmission, which was completely underwater after the storm.
I called my insurer, Progressive Insurance, and they sent an adjuster out. At the same time, I called a diesel mechanic I knew and asked him to come out and take a look. I had a deductible of $9,500+ and wanted to know whether the repair would exceed it. He told me it would probably exceed it by 5 times!! The adjuster from Progressive came out to inspect the boat and said the damage was mostly engine-related, but the engine had to be removed to assess the extent of the damage. The R-27 has a D3-200-Hp Volvo Penta Diesel Engine, and for insurance purposes, can only be repaired by a Volvo-certified dealer. He said in SW Florida that only left Diversified Yacht Services Inc. in Fort Myers Beach, Florida. The problem was that Fort Myers Beach was devastated by Hurricane Ian. He said their repair shop, about half the size of a football field, was covered by a 14-foot storm surge of saltwater. The estimate was that Diversified would not be open until April 2023 at the earliest.
Diversified would only be repairing the engine, and since they could not work on the boat until April 2024, non-engine-related items had to be addressed. I hired Professional Marine Services from Fort Ogden, Florida, to make those repairs. We knew that the engine would have to be removed from the boat to work on it. Certain items could be repaired in the four months before the boat went to Diversified. Most of Professional Marine Services’ work could not be done until we got the boat back from Diversified. New Bow and Stern Thrusters were installed, along with any wiring related to them that had been damaged by water. The Air Conditioning Water Pump and the Macerator Pump were removed, and replacements were ordered. The bilge pumps had failed, so we worked together to design a more fail-safe system and order the necessary parts. All of those repairs will be covered in more detail in a separate section of this website.
Due to damage from Hurricane Ian, Diversified was closed, and I was not able to contact them until the end of January 2023. Diversified put in a new engine water strainer for me in 2017, so they were familiar with the boat. I was told they could not accept the boat until the end of April 2023 and that I should call sometime in March. When I called in March, I was told to bring the boat in on April 25, 2023. Fortunately, I had a trailer, so Boat US towed the boat from my home to the boat launch, about 2 miles away. We put the boat on the trailer and towed it 60 miles to Diversified on April 25, 2023.
Diversified knew I had it on a trailer and said they would find a place inside the shop area until work was completed, rather than leaving it in the parking lot. I was told they would do their best to repair the boat as quickly as possible, but thousands of boats in their area of operation were damaged, so patience would be needed. That turned out to be an understatement, as I was not able to pick up the boat and bring it back to my house until April 18, 2024, almost a year later. There will be a separate section included covering all repairs made to the engine, as well as a brand-new transmission.
There are numerous items included in the sale, such as the Portland Pudgy Dinghy with accessories, 2 Brickerton Portable Folding Aluminum bicycles with heavy-duty nylon storage cases, a Dometic 52 Quart 1.7 cu ft refrigerator/freezer, and numerous other items to be discussed with pictures and videos in the sections that follow.
.jpg)
The boat, trailer, and truck are in a rest area. The truck is a 2004 Chevrolet Avalanche 3/4-ton with a big-block 8.1-litre gas engine. Presently has 72,000 miles and pulls the boat flawlessly.

The boat is in the Pink Shell Marina in Fort Myers Beach. Note that the four front windows are covered with white Phifertec sun shades and privacy window covers. Very useful when in a marina. If you are in the boat, you can see out, but no one can see in.
The bow faces west with three Sunbrella curtains, bow, port side, and stern with no Sunbrella on the starboard or north side, as the top blocks the sun. It takes about 15 minutes to remove or put on the Sunbrella.
.jpg)
When trailing the boat, we would stay overnight at RV Parks. All electrical cords and RV connectors are included. We usually used the RV restrooms. All fans worked on the boat but not the air conditioner.

The boat is moored in the Fort Myers Beach mooring field. Note the Dinghy tied to the swim platform, which is used to go back and forth to the Dinghy Dock.
.jpg)
Note that no Sunbrella is needed on the Starboard side, as the sun never hits it.
_JPG.jpg)
Anchored bow out and stern tied to mangroves in Boca Grande Bayou. We were able to do this as the boat only drafts 26" due to the tunnel drive.
.jpg)
Anchored in the intercoastal waterway off Jensen Beach after traveling through Lake Okeechobee and St Lucia River from the west side of Florida.
_JPG.jpg)
We are anchored at a floating dock at the Calusa Island Marina in Goodland. The front windows are covered on the inside with custom curtains, which will be shown from the inside in the "Cabin Interior" section.
%209%2014%20(32)_JPG.jpg)
Refueling at the America Marine in LaCrosse, Wisconsin, on the Mississippi River. Diesel Fuel is only available at certain marinas on the Mississippi River, so you need to plan ahead.
.jpg)
_JPG.jpg)
We backed the boat into a slip at the Naples City Marina, which is easy to do using the bow and stern thrusters.
_JPG.jpg)
We are anchored in "Smoke House Bay", accessible by the canal system in the interior of Marco Island. The picture was taken from our Dinghy after reprovisioning at the Winn Dixie, where there is a dinghy dock.
%209%2014%20(168)_JPG.jpg)
We are cruising north on the Mississippi River into a 3 Knot current. While traveling south, we cruised at 12 knots, giving us a speed over ground of 15 knots. The picture shows the boat traveling 17 Knots at 3,600 RPM, our fast-cruising, all-day cruising speed, giving us a speed over ground of 14 knots due to the current.
We are at the Wabasha Marina in Wabasha, Minnesota. It is a typical Marina that you would find on the Mississippi River. The slips for the larger boats are usually covered, which, because of hurricanes, is not the thing in Florida. The downside is the Spiders!
SPECIFICATIONS
Boat & Anchor & swim platform
30 ft
Length on Deck
27 ft (LOA)
Beam
8 ft 6 in
Min. Draft
26 in
Dry Weight
6200 lb
Max Bridge Clearance
8' 9" (In water with mast down)
Max Bridge Clearance
12 ft (In water with mast up)
Height on trailer with mast down
11' 8"
Bottom Paint
Pettit - Vivid 1861 Black - Ablative / Hard in one product
Engine Type
Inboard
Engine Make
Volvo Penta
Engine Model
D3
Fuel Type
Diesel
Power
200 hp
Drive Type
Direct Drive
Engine usage (hours)
650
Fuel Tank
100 gal
Fresh Water Tank
40 gal
Holding Tank
30 gal
NAVIGATION and ELECTRONICS
Garmin Navigation Suite of Instruments:
Chartplotter - Garmin GPS MAP 7212
Depth Finder - Garmin GSD 22 - high-performance digital remote sonar sounder module
Autopilot - Garmin GHC 10
Remote control for Garmin GHC 10 Autopilot
Radar - Garmin - GMR 18 HD/24 HD
VHF - Fixed Mount - Garmin VHF 200
GPS Sensor - Garmin GPS 19x sensor - mounted on decorative smoke stack.
All Garmin devices, including the Volvo Penta engine information available on the Volvo Penta 4” display, are connected to the NMEA 2000 network, and much of that information is available through the display on the GarminGPS Map 7212 Chartplotter.
Handheld GPS - Garmin GPS 72H with 12-volt mounting dock already set up at the helm station. Complete owners' manual included. Used as a backup but mainly to keep track of the distance traveled on each trip.
Magnetic Compass - Ritchie 2 ½” compass that lights up when the Nav lights are on, mounted at the helm station.
Handheld VHF - Standard Horizon HX270S VHF/FM Marine Handheld Transceiver, Submersible, with mount on the right side of the instrument Panel
Accessories:
Charger Cradle
Alkaline Battery Case
7.2 V, 1400 mAh Ni-MH Battery Pack
DC Cable with 12V Cigarette Lighter Plug
120 VAC overnight charger
DC Cable; plug and wire only
Complete owners manual
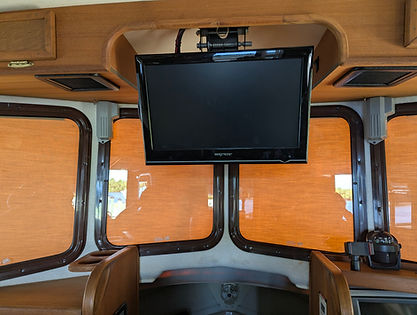
Television with DVD player:
Majestic Model LED 190DU LED 19” TV
Remote Control
Antenna - Majestic Marine and RV Antenna mounted on the Radar mast
Has a 12V power booster that Ranger Tugs wired to be on all the time. I changed that and added a switch just to the right of the TV, when in the fold-up position, to turn on the power, so it was only on when the TV was being watched. It has a red light on the switch to remind you if you leave it on.
Radio - Pyle - Marine Grade In-Dash AM/FM Receiver with MPS Playback and USB/SD/Aux Inputs, and Bluetooth, with remote control. A dual-male-ended headphone cord can be plugged into the TV and then into the radio to play the TV audio through the larger Fusion speakers in the main cabin and the cockpit.
Speakers in Cabin: 2 Fusion MS-BX3020 2-way full-range cabin speakers.
Outdoor Speakers - 2 Fusion Outdoor speakers in the back cockpit.
There is a smartphone mount on the left side of the counter above the helm station.
There is a mount we used for a 9-inch tablet on the right side of the counter above the helm station. We used it as a backup GPS using an app of your choosing.

This is the helm station. The top surface on the left has an adjustable cell phone mount. To its right is a 2 1/2 Ritchie compass that lights up when the nav lights are on. The large mount to its right is for a tablet to be used as a backup chart plotter or anything else, for that matter. Next to it is an LED flashlight in a teak mount. At the far right is a Garmin GPS 72H mounted on a 12-volt docking station. It can be removed from the docking station and used as a stand-alone GPS, but I do not use it for that. The Garmin 7212 GPS is the brain of the boat, connected either directly to devices such as the sonar, radar, and autopilot, or to the Garmin fixed-mount VHF 200 and the NMEA 2000 network, which includes the Volvo Penta engine display. The Volvo Penta digital display and the Garmin GHC 10 autopilot are to its right. Hanging on a mount below and to the right of the autopilot is the Standard Horizon HX270S VHF handheld.

This is a side view of the helm station.

On the left is the remote control for the bow and stern thrusters with a lanyard to hang around your neck, which is recommended when you are outside on the boat. Just to the right of the wheel is the helm station windlass control for raising and lowering the anchor. Most of the time, the foot controls next to the windlass at the front of the boat are used. To the far right are the bow and stern thruster controls to use when at the helm station.

This is the high-water alarm for the bilge and the Garmin VHF 200.
_JPG.jpg)
On top of the boat is the horn, spotlight, and Garmin HD radar dome. Above the Radar is the omnidirectional TV antenna.

Standard Horizon VHF, charging station, 110-volt charger, and 12-volt charger for the charging station, and also included is a battery pack for the VHF
This is the Majestic 19-inch LED TV with DVD player in fold-down position.

Television in fold-up position.

This is the power switch for the TV and also turns on the booster. When the switch is turned on, a red light turns on.
_JPG.jpg)
This is the Pyle Marine Grade in-dash AM/FM receiver with MPS playback, USB/SD/AUX Inputs, and Bluetooth, with remote control.

Fusion speaker on the rear port side of the cockpit. Identical speaker on the starboard side

V-birth access to instruments and wiring behind helm station.
ENGINE and DRIVETRAIN
In the introduction, we briefly discussed the damage Hurricane Ian caused to the R-27. Now we will elaborate on that and go through the repairs needed to get it back to 100%. Before taking the boat to Diversified for engine repair on April 25, 2023, additional repairs were needed beyond the engine. Some of the repairs could not be done until the engine work was completed, and we got the boat back on the trailer and into our driveway. We will discuss all of those repairs in a separate section. This section will deal with repairs to the engine and transmission.
When we dropped the boat off, the service person who would be handling our boat, Charlie, told us that the adjuster from Progressive Insurance, our insurance company, had been in touch with him, and he would keep him apprised of the progress. Everyone knew that this was going to be a substantial claim. The adjuster authorized an advanced payment and agreed that Diversified would remove the engine and meet again once Diversified had prepared an estimate of the damages. We were also to be contacted once the engine was removed, so they could review the damage with us and discuss a timeline for completing the repairs.
We were contacted in the middle of June 2024 and scheduled a meeting for June 21 to inspect the engine and engine compartment with the engine removed. The adjuster had already been there by the time we showed up, took pictures, and would wait to receive Diversified’s estimate. The main portion of the engine hung from chains, with many of the parts that needed replacing spread across several tables. Charlie met with us and discussed the game plan. He said that everything damaged or in need of replacement would be repaired or replaced to make the engine as good as new. He said many items, such as the motor mounts, impellers, all the belts, belt tensioners, timing belt, and more, were time-sensitive and had already exceeded their replacement schedules, so it was good that they were getting replaced. He had no idea whether the transmission was damaged, as it was completely submerged in water in the engine compartment. They will change the transmission oil and the filters, put it back on the engine, but until it is run in the water, they will not know if it was damaged. Everything else will be replaced with new factory parts. The following is a list of the parts that were replaced, including the transmission, which had to be replaced rather than repaired.
Air Cleaner
Alternator
Alternator belts - 2
Belt Tensioner - 2
Belt Tensioner Kit
Cable Connection
Cable Kit
Cover
Feed Pump
Flange Screw
Flexible Coupling
Fuel Filter - 2
Hexagon Nut 8
Hole Tin Plated Lug 1/0 GA 38”
Idler Pulley
Rubber Cushion - Engine Mounts - 4
Solenoid Valve - 2
Spacer Nut
Spring Washer - 4
Starter
Timing Belt
Tin Plate Lug 1 GA 5/16
Tooth Belt
Transmission - ZF45SAE-C Reverse Gear 2.03 Ratio and Connective Cable
Volvo alternator Belt
Volvo Impeller Kit
Volvo V-Ribbed Belt
Water Pump Kit
Wiring Harness
Wiring Harness Kit
All new wires that were underwater
All cleaning supplies
All Oil
Engine Coolant
Replaced Positive and Negative Cables
Volvo Paint green
Charlie had told us that it would take some time to receive all the replacement parts and put the engine back together. We did not anticipate that it would take almost 2 months. Finally, on August 16, 2023, we traveled to Fort Myers Beach and inspected the engine before reinstalling it in the boat. Everything looked new, and the bottom of the engine had even been repainted. Charlie said they would put the engine back in the boat. They would then start it in the shop to make sure everything worked. He planned to put the boat in the water for a water test on August 22, 2023. He said it was not necessary for me to be involved in the test drive, but that would come at a later date, once they were satisfied that everything was working properly.
Charlie contacted me after the water test and said there was a noise in the transmission that the mechanic thought might be the coupler between the transmission and the engine. Everything else on the engine worked perfectly. On September 5, 2023, Charlie called and said that they were able to remove the transmission enough to check the clutch in the transmission and bell housing, and it was OK. They will now check the transmission gears. Sometime in the next few weeks, they evidently bolted the transmission back onto the engine, started it in the shop, and shifted it between forward, neutral, and reverse. There was a clunk during shifting, and they texted me a video to see if that was normal. The transmission had no cable shifting and was all “fly by wire”, which was very smooth and quiet. I told them I had never heard that clunk before. At this point, they determined they either needed a new transmission or a repair.
Charlie called on September 25, 2023, and said he had been in touch with the adjuster and told him he had contacted the transmission shop Diversified used in Stuart, Florida, and was told that it cost far more to repair a transmission than buy a new one.
On October 10, 2023, I got a call from my adjuster, who told me that Charlie had moved on because he wanted to be a mechanic rather than a supervisor. My adjuster had also checked with the repair facility in Stuart, which recommended against repairing the transmission and instead ordering a new one. He made that recommendation to Progressive, and they authorized ordering a new transmission. I told him to have the check sent to Diversified to save time.
I received a call on October 19, 2023, from Mike, the Service Manager at Diversified, who said he was taking over my case from Charlie. He said they had received the check from Progressive for the transmission and had placed the order. He would let me know as soon as he had the delivery date, but said it would likely be more than a month.
I was used to not hearing from people, but I thought that Mike, as the service manager, would be good at keeping me up to date. Having not heard from him for a month, I sent him an email on November 21, 2023, not only as a reminder but also to provide him with a history of my case, since he was new to it. I never heard back from him, so on December 4, 2023, I called Marcie, the office manager, and she told me that Mike died of a heart attack on November 20, before the arrival of my email. She said that everything was pretty messed up due to Mike’s death, and she would try to find out who was going to take over my case from Mike.
Nathan was assigned to my case and called me on December 5, 2023, to say he knew little to nothing about it. He knew that Diversified received the transmission on December 1, 2023, and that he would review my file and talk to the mechanics who worked on the boat to get up to speed. Marci was honest with me and let me know that Nathan was new at the job. I made it a point to spend some time on the phone with him to give him a complete history of the case because I did not trust him to review all the correspondence. In addition, he inherited this job over Christmas and New Year's, so I needed to be patient. He did let me know on December 18, 2023, that they were short-staffed over the Holidays and that he would get back to me sometime in January 2024. True to his word, I received a call at the end of January that the boat's new transmission would be installed in the next couple of weeks.
Nathan called on February 12, 2023, to tell me they had just taken the boat out for a water test and that everything worked great, including the transmission. We set up a time for me to take a sea trial on February 15, 2023. I showed up for my sea trial, and Nathan and I walked from his office down to the boat, about a city block away. Nathan was in his mid 30s and seemed like a nice young man. When we got to the boat, it was locked, and he asked me if I had a key. I told him I gave all my keys to Charley. He said he would go back to the office and try to find the key. He said I might as well stay on the boat until he got back. I thought maybe he thought I was too old to walk that far! About 45 minutes later, an older gentleman in his 60s, dressed in a work uniform, showed up with the key. I asked him if we needed to wait for Nathan, and he said there was no need for him to ride along. We introduced ourselves, and Sid told me he was the senior diesel mechanic at Divrersified and had either supervised or done most of the work on my boat since its arrival. Needless to say, I was already feeling better.
I asked Sid if he was going to check out the instruments, and he started laughing. He asked how long I had owned the boat, and I told him 10 years. He knew the boat had over 600 hours on it and said I would be far more qualified than anyone at Diversified to check out the instrumentation. If I noticed issues, then they would deal with them. He said that all instrument-related issues were outsourced to companies specializing in that area. He was out on the boat on February 12, and everything performed as it should. He came along to make sure I had any questions answered. We opened the boat, and he told me to get it started while he removed the lines and bumpers. I had not used the thrusters, other than testing them at the dock, since Professional Marine Services installed the new ones in April of 2023, before the boat arrived at Diversified. In our conversation, Sid knew that I had been to and stayed in Fort Myers Beach on this boat, or on others I had owned, many, many times over the 20 years I had been boating in SW Florida. In order to properly test the engine and transmission, we had to leave the protected anchorage of Fort Myers Beach and go out into what is now the Gulf of America.
Sid said it looked like we had 2-foot to 3-foot waves in the Gulf and wanted to be sure I did not have a problem with that. He had never been on this particular boat before and asked if it could handle the waves. I joked with him and said, “If you can handle it, the boat can handle it”! The thrusters worked great, and we headed out to the Gulf. I had already turned on the VHF, chart plotter, depth finder, and autopilot while we were still at the dock, and everything worked. I would check out the radar and autopilot once we got out into the Gulf.
Sid took over the helm as we got out into the channel, so he could monitor the engine and other information available on the 4” Volvo Penta LED display. No one ever showed me how to access all the information available on this gauge, nor did I take the time to learn about it. For the engine, the following items can be monitored: engine speed, engine hours, engine coolant temperature, battery voltage, engine oil pressure, turbo pressure, exhaust temperature, transmission oil pressure, transmission oil temperature, propeller rotation (rpm), and % ahead speed. Sid told me it was necessary to check most of these items at different speeds to ensure the engine and transmission were operating properly. Other information available on the display pertained to fuel, but most of it is available on the chart plotter, which is synced with the Volvo Penta Display and easier to read. A whole section was devoted to the vessel itself, including fuel level, boat speed, and more, which were also available on the chart plotter. It was very helpful to know that information about this gauge was available in case the chart plotter failed.
We were gone for about 1 ½ hours, and the autopilot and radar worked as they should. Sid was impressed by how well the autopilot performed in relatively heavy seas. We ran the boat at various speeds, and Sid explained the different readings for turbo pressure and exhaust temperature, which I was not familiar with. I never even knew I could check the transmission temperature and oil pressure, which Sid said I should get into the habit of checking occasionally to make sure there were no issues. Sid operated the boat about half the time and was impressed by how it handled in 2-foot to 3-foot waves.
Once we returned to Diversified’s dock, Sid told me everything checked out and that I should be able to take the boat back to my house once all the paperwork was done. I should have known when he mentioned all the paperwork that things wouldn't go smoothly.
I am not going to bore you with the details of what happened from February 15, 2024, until the boat got back to my house on April 19, 2024. Suffice it to say that because of all the changes in the service personnel who were responsible for my boat at Diversity, the coordination between my insurance company, Progressive, and Diversified fell through the cracks. There was evidently considerable work on the boat done without Progressive's approval. It took Diversified over 2 weeks to prepare a draft of their final invoice for submission to Progressive. When it was submitted, Progressive had changed the desk adjuster on my case in December 2023, and she had never received anything from Diversified. She ended up submitting the draft invoice to the CAT Team or Progressives' disaster team’s adjusters to review everything with Diversified. As it turned out, everything was OK; it just did not get finalized until April 19, 2024, when I paid my deductible and picked up the boat.
Numerous pictures and explanations will follow regarding the repairs Diversified performed on the boat while it was at their shop.

Some of the parts to be replaced or repainted. All pictures of the parts and dismantled engine taken on June 21, 2023.
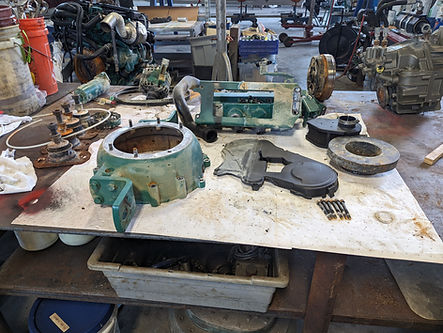
Parts from a different angle. The starter and alternator are at the top left, and the transmission is on the top right.


The front of the engine, and most of the parts on the bottom, will be replaced
Front and port side of the engine, with many parts removed; all wiring to be replaced.


Port side of the engine with the alternator, starter, and heat exchanger already removed.
Rear of the engine without the transmission. You can see that the top of the engine is completely untouched by the water.

Starboard side of the engine after repairs, just before being installed back in the boat. Picture taken August 9, 2023. On the left is the original transmission. The new transmission was finally installed in the first week of February 2024, just before the water test on February 12, 2024.

Rear of the engine after repairs.

Front of the engine after repairs.

Port side of engine after repairs.
MISCELLANEOUS NON-ENGINE REPAIRS FROM HURRICANE IAN
Diversified, when I contacted them in January 2023, told me they could not accept boats for repair until the end of April 2023. Diversified was going to focus only on repairs to the engine and drivetrain, leaving me three months to remove and install new bow and stern thrusters, remove the macerator pump, and remove the air conditioning pump, so it would be out of the way for the engine removal.
The rear thruster was in a splash-proof case rather than a waterproof one. I removed it on January 31, 2023, but as they say,” never again”! As you can see in the pictures that follow, it is in a small compartment at the rear of the boat, and it is not meant to be removed by a 5-foot-8-inch-tall, 79-year-old! I managed to pop two ribs, which took 3 months to heal before I could play golf. I got an “I told you so!” from my wife.
I removed the bow thruster on February 1, 2023, after removing the cushions in the V-birth. It was easy to work on and remove the bow thruster. I called SidePower, the thruster manufacturer, and was told that the bow thruster, which was not in a case, was toast the minute it went underwater and could not be repaired. They said there was a small chance the stern thruster might be repairable, but I would have to send it to them for inspection. My adjuster said to send it to SidePower, and if it could not be repaired, they would cover the shipping. SidePower sent me pictures, and it was not repairable.
I ordered a new bow and stern thruster, and they arrived on March 1, 2023. Matt, the mechanic from Professional Marine Services, came by sometime in March to inspect the thrusters and all the wiring connecting them. He gave me a list of all the wires and connectors he would need and set April 14, 15, and 16, 2023, to do the install. The ends of the wires connecting the thruster were underwater, which meant they were subject to wicking, where water is drawn into the wires. Some wires had to be completely replaced, and others were cut back by 6 to 8 feet due to wicking. At that point, we needed terminals to connect the new wires to the old ones. Some of the old control wires also had to be replaced. Matt was about 6’ 4” with long arms and could access the rear thruster more easily than someone like me. All the work was done, the boat was lowered on the lift into the water, and the thrusters worked fine. They would still need to be tested after the engine work was finished, which turned out to be during the Sea Trial in April 2024, and they worked perfectly.
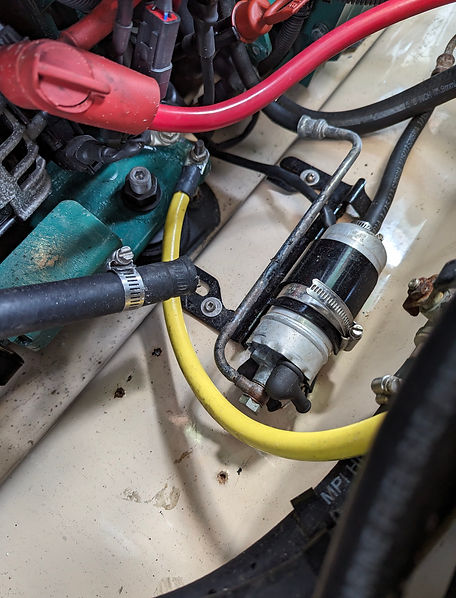
The R-27 finally returned to our house on April 20, 2024. The first thing I did was look over the engine compartment to see what still needed to be done. I had removed the air conditioning water pump before taking the boat to Diversified. I wrote them a lengthy letter explaining that and other items. I also included a thumb drive with a picture before I removed the air conditioning water pump and another after it was removed. I immediately noticed that the electric fuel pump for the engine was installed where the air-conditioning water pump used to be, and the new one has to be as well. I emailed Diversified, explained the problem, sent pictures, and they got back to me right away. We set a time for Sid to come to my house and reinstall the electric fuel pump where it belongs. The first thing Sid did was apologize to me for all I had been through to get the repairs at Diversified. He said they lost many employees because they were shut down for 8 months, and it is only now that they are getting back to normal. He has been there for 25 years and has never seen a case where someone ended up with 4 different service personnel, one of whom passed away during his tenure. He was frustrated because he had installed the electric fuel pump, but no one told him the air conditioning pump should have gone there, which made sense considering all the different service personnel I had. Anyway, he moved the electric fuel pump back to where it should have been and told me to call him if I had any further problems.
In early May 2023, before I took the boat to Diversified, Matt stopped by to discuss alternatives to the bilge pump placement in the stock R-27, which failed when rainwater entered the engine compartment after the scuppers clogged during Hurricane Ian. The factory-installed aft bilge pump was a Johnson submersible/centrifugal pump rated at 750 GPH, with a Johnson Pump electronic water-level sensor. It was located beneath the transmission and drive shaft, making it nearly impossible to service. It sat in the bilge, and the electronic sensor accumulated a lot of oil and dirt, which caused it to malfunction. First of all, the pump was very difficult to access for cleaning dirt and grime off the electric sensor and the pump itself. It was all by feel. At least once a year, the pump itself had to be removed and the impeller cleaned. There was very little space between the pump and the driveshaft, and the pump mount was screwed into the keel below the transmission and driveshaft. The sensor, which was clipped to the rear of the pump, had to be removed first, then the pump was carefully turned to avoid breaking it and lifted off the mount. I do not think I ever did it in less than an hour with a lot of effort.
Matt and I decided that it made a lot of sense to get a self-priming diaphragm pump that could be mounted on the side of the engine compartment. We settled on a SPXFLOW Johnson Viking Power 16. This pump was self-priming up to 3 meters in height; the non-choke valve meant no inline filters were necessary, it will run dry without damage, and it can handle a mixture of air and water with no difficulty. More expensive but far superior. It was necessary to have a bilge pickup for water, and we chose a Jabsco Strumbox bilge strainer fitted with a non-return valve to prevent backflow into the bilge. The float switch we used was a Water Witch Model 101, which was very highly rated. We did not want to screw in the Jabsco Strumbox bilge strainer mount under the drive shaft because it would also be hard to remove for cleaning. Instead, we used a piece of aluminum designed to be attached with 2 screws to the outside wall of the engine compartment and tie-wrapped to the hose connected to the Jabsco Strumbox bilge strainer, keeping the strainer in position directly under the drive shaft. For cleaning, all that was necessary was to remove the two screws, lift the strainer out of the bilge, clean it, replace it, and reattach the screws. This is all covered in the pictures that follow.
The forward bilge pump sits about 6 inches above the bilge and is not regularly exposed to bilge water. When the boat was designed, it had a shorter Yanmar Engine, and there was ample room from the engine to the cabin bulkhead. My boat was the first year they switched to the Volvo Penta Engine, which was a longer engine and left little room between the engine and the bulkhead. This made it very, very difficult to access the bilge pump, which was identical to the old aft bilge pump, including the Johnson electric water-level sensor. In addition, another Johnson water-level sensor was connected to the high-water alarm at the helm station and attached to the bulkhead about 8 inches above the forward bilge pump. Matt decided we needed to mount the forward bilge pump and the high-water alarm on an aluminum angle bar that we could attach to the bulkhead, so we could remove the bilge pump and float switches for cleaning and maintenance, just like the strainer for the aft bilge pump. Johnson Controls makes a submersible/centrifugal Low Boy Bilge pump with the water pickup at a 90-degree angle rather than straight out of the bottom of the pump. This allowed us to screw the pickup to the angle bar and use tie-wraps to attach the pump, along with a Water Witch Float switch for the pump and another for the high-water alarm. This is all covered in pictures that follow.
Matt had to install and rewire the new macerator pump, which required all-new wiring. It was very accessible and easy to install because it could be installed in exactly the same place as the damaged one. The new air-conditioning water pump was another matter. It was located far down in the bilge toward the front of the engine on the port side. I had taken the damaged one out, which was far easier than putting in the new one. My arms were not long enough to even reach the pump, whereas Matt, with really long arms, still had a tough time. The pump was 120-volt, and wiring it up took longer; we had to use a waterproof box to contain the splice. Matt did a great job, as you will see in the pictures that follow.
All the green #8 ground wires ended up underwater, which meant the wires and connectors had to be replaced and the terminals cleaned. It was very labor-intensive, as most of the grounding points were difficult to access and clean due to years of exposure to water. Fortunately, Matt had long arms and could reach everything. We used over 60 feet of #8 wire and about 30 connectors, including a new grounding terminal dedicated to the wires being replaced. Pictures will follow this section.
On October 19, 2024, our boat club had scheduled a 3-week cruise with 20 of our club boats to Clearwater Beach, with stops along the way. This was the first major cruise that was scheduled since Hurricane Ian in September 2022. On September 23, 2024, I was finalizing preparations to get the boat ready. I took the boat off the lift and was going to give it a test run. I put the radar arch up, and rusty water poured out of the search light. I immediately took the bulb out, and you will see by the pictures that it was shot! When the boat is on the lift, I have the radar arch in the down position just like I do when we take the boat somewhere on the trailer. The cover blew off the lift during Ian, and because the light lies on its side, the 140 MPH winds and 12 inches of rain forced their way into the light. This was the first time we noticed it. Progressive reopened the claim from Hurricane Ian and appointed a new adjuster to the case. He told me that we had a Hurricane Helene headed our way and we would touch base after it passed. Hurricane Helene hit us on September 26, 2024. For us, the wind was not that bad, but the storm surge was horrific. We had lived here 22 years, and the surge was 4 feet higher than it had ever been. If it had raised another foot, it would have been inside the house. The problem was that it came north up the west coast of Florida and turned northeast right up Tampa Bay, and continued up into North Carolina, with many people being killed. Needless to say, our club had to cancel our reservations at all the marinas from Sarasota, Florida, north, where our cruise was headed. To rub salt in our wounds, Hurricane Milton came east across the Gulf from Mexico and made landfall near Sarasota, Florida, on October 10, 2024, just 2 weeks after Helene. We had a lot more wind with Milton, with no damage. The storm surge was terrible again and came within an inch of what it was with Helene. I feel confident that I will be long gone before that high of storm surge happens again.
My new adjuster and I touched base again in November 2024, and he had checked and found out that the Jabsco 63020 was no longer in production. This was an expensive light, and he gave me the list price on the last available listing he could find. In addition, he had the name of the company that provides the new motor for these spotlights. I ordered one, and a friend of mine an I put in the new motor, polished it up, and it looks better than new. Over the 12 years we had the boat, we used the spotlight only once, since we seldom traveled at night. Pictures to follow.
.jpg)
.jpg)
This is the rear thruster after it was unbolted from the drive leg. It had to be replaced because water entered the case, which was only splash-proof.
The compartment on the right is where the thruster has to be connected to the drive leg. There is very little space, and you need long arms to bolt the motor to the drive leg.

The drive leg is inside the thruster tube, which is located on the outside of the hull. The mounting bracket is water-tight, and the thruster motor can be removed to change the shear pin if necessary while the boat is in the water. If rainwater gets into the compartment, a drain leads to the engine compartment. In this case, the water in the engine compartment was higher than the drain, causing the water to back up into the thruster compartment.

The original 10-foot yellow ground was replaced with a black ground due to wicking. Eight feet of the red positive also needed to be replaced due to wicking and was connected to a post along with the remainder of the positive line.

.jpg)
This is the compartment directly behind the generator compartment. The red positive line comes from the thruster, runs right to left, and connects to a post, along with the positive that continues to the main thruster switch, past the generator. The dinghy/additional house battery is stored there and removed to the dinghy when necessary. Adjacent to it is the stay-plug used in an emergency to plug leaks.
This is the Bow Thruster under the V-birth cushions after the water damage. The water destroyed the motor and all the wiring, which had to be replaced. Six feet of both the ground and the positive line had to be cut off due to wicking. The control wires also had to be replaced.

.jpg)
This is the new bow thruster along with new wiring. The black ground and red positive lines run up to a post and connect to the posts where the positive and negative lines from the thruster switch are attached. New control wires also had to be spliced and connected.
.jpg)
This is a picture of the air conditioning water pump after the water damage and before removal.
This is where the Air conditioning water pump was mounted and removed before taking the boat to Diversified for repairs. They were given this picture.
This is a picture of where Diversified mounted the engine fuel pump that Sid had to travel to my house to relocate. Note the holes where the air-conditioning water pump needed to be mounted.


New air conditioning pump and plumbing hooked up. The only thing left is to connect the 110 Volt electricity to the control panel. Loose wires in the upper left need to be connected in a waterproof box.
Electricity is hooked up to the air conditioning and water pump. Note the waterproof electrical box that is zip-tied to a hose in the middle of the picture.
.jpg)
Water-damaged Macerator removed April 2, 2023, just before delivering the boat to Diversified for engine repairs. Note the yellow, damaged air-conditioning pump in the background, which was also removed at the same time.

New macerator pump and wiring installed by Matt on May, 31, 2024.

The original red bilge pump was mounted below the transmission and drive shaft, making it almost impossible to access for maintenance.

The Johnson Viking Power 16 diaphragm bilge pump is mounted on the Starboard side of the engine compartment for easy maintenance.

The Jabsco Strumbox Bilge Strainer is located under the transmission and drive shaft. It is held in place by a piece of aluminum tie-wrapped to the hose to hold it in position.

This is the engine compartment with the engine removed. The red bilge pump is on the right, with a black water sensor mounted above it, connected to the high-water alarm at the helm. The bilge pump also had a water sensor connected to it. Because the engine was far forward, it was impossible to access the water pump for maintenance.

This shows the pump and high-water alarm in place, and the next picture shows how it is attached to the bulkhead

This is an example of the green grounding wires that were replaced. These took a long time to clean up as they were down in the bilge.

Matt added this terminal block to which to attach all the grounding wires.

Close-up of damage to the motor of the spotlight.

I am on the left with my friend after we got the light all polished and the new motor and bulb installed.
.jpg)

This shows the piece of aluminum screwed into the engine compartment wall to facilitate easy removal of the Strumbox for maintenance.

We mounted the pump on a piece of angled aluminum. This is a low-boy bilge pump, and the water pickup is not at the bottom of the pump but rather where it is bolted to the aluminum. One water-witch float switch is attached to the pump with a stainless steel hose clamp and turns the pump on. The other float switch is bolted to the aluminum about 4 inches higher and is connected to the high-water alarm at the helm station.

The aluminum support goes down into the bilge at about a 45-degree angle and is attached with 2 screws, similar to the aft bilge pump, for easy removal during maintenance.

A lot of the grounds you see are bolted through the transom to supports for the swim platform.

Showing damage to the spotlight before removal from the boat.
New motor and circuit board before inserting back into the spotlight case.

This is a hand-held spotlight that, in most cases, is easier to use and better than the spotlight in the previous picture. There is a window right next to the helm station, with a cigarette lighter plug 18 inches from it. It is easy to plug it in and extend your arm out the window to aim it. The advantage is that you can aim it so the light doesn't reflect off the stainless steel railings, which isn't possible with the fixed light. To be honest, in the 11 years we used the boat, we only used the fixed light once. We used the handheld a few times, but we seldom used the boat in the dark.
This picture shows the light bulb. The handle has multiple adjustment positions.
BATTERIES, CHARGING SYSTEM, INVERTERS, GENERATOR, and 110 VOLT SYSTEM
The Ranger Tugs are manufactured in Seattle, Washington, and not in SW Florida. Many of the boats manufactured do not need either an air conditioner or a generator. Because of that, they decided to put all four 110 Amp 70-pound AGM batteries in the aft compartment on the port side of the R-27. Right in front of the Batteries on the port side was the 150-pound Mase IS 2.7 KW generator. Also on the port side, forward in the cabin, was the 75-pound Wabasto 16,000 BTU Marine Air Conditioner. In addition, I added a Dometic refrigerator/freezer, along with an insulated, sealed case and seat, for a total weight of 60 lbs, also on the port side at the rear of the cabin. When the boat was sitting in the water with no passengers, it listed substantially to the port side. The area on the Port side where the batteries were originally stored was small and difficult to work in. I wanted to add a Victron BMV-700 battery monitor to monitor the house bank of batteries. The BMV-700 has a shunt to which the house battery ground was connected on one side, and the other side was connected to the ground bus bar. It would involve relocating all grounds from any 12-volt devices drawing power from the house bank to a bus bar. It made sense to move all four AGM batteries from the port compartment to a much larger compartment on the starboard side of the rear cockpit. Adjacent to where the batteries were relocated was the ProMariner 20 Amp 3-bank charger and the ProMariner 1500-watt TruePower inverter, which made the devices far more efficient than running the wires all the way from the other side of the boat. It was a lot of work but well worth the effort.
The R-27 was stored at Diversified for a year, during which time the batteries were not maintained. Those batteries were new in February 2018. In April 2024, when Diversified had finished the repairs and the boat was back at my house, we checked the batteries, and they needed to be replaced. I ordered 4 new Batteries: UPG 12-Volt 110 Ah L3-terminal lead-acid (SLA) AGM rechargeable batteries, which I received on April 30, 2024. Matt installed them in May 2024, and I have been maintaining them since then. The other Battery used on the boat is an EverStart 70Ah AGM. This battery is an additional house battery connected to the board's charging system. I can be removed and used as the Battery for the trolling motor on the Portland Pudgy Dinghy. I removed the EverStart Battery from the boat before it was taken to Diversified for repairs in April of 2023. I kept it charged and used it as an emergency battery in case of a hurricane during the 2024 hurricane season. Fortunately, I did not need it for that purpose. That battery has had little use and satisfactorily passes a load test. It has been connected to the battery bank, which is maintained, as are all the other 4 batteries. The five AGM batteries are all connected to a BatteryMINDer Model 2012 12V 2AMP Charger-Maintainer-Desulfator, which can charge up to 6 batteries. When the boat is on the covered lift, the solar panel does not work, and this is the only charger we utilize to maintain the batteries.
The Victron BMV Battery Monitor is a fantastic device. We also have the dongle accessory with ours, which lets us monitor via Bluetooth through an app and view all the information it provides. The Victron is amazing; it keeps track of amps both in and out, current and voltage, % of battery remaining, an estimate of time remaining at current usage, an estimate of time to bring back to 100% given current AMP input, and many other settings. This same information can also be obtained from the gauge itself, which, along with the Dongle, is mounted at the helm station. We used the Victron all the time, but particularly when we were anchored and not in a marina. During the day, if it were sunny, the Kyocera 140-watt solar panel would keep up with the two main power users on the boat, the refrigerator and the freezer, until about 5 PM when the sun was getting low on the horizon. At that point, there would be about a 6-AMP drawdown on the batteries, which would increase as we increased electric use with the TV, charging electronic devices, lighting, inverter use, and more. By 8 AM the next morning, the Victron would show an AMP usage of about 130-140 AMP, with about 75% of the battery remaining. If we were leaving the anchorage for another anchorage or a marina, the 140-AMP alternator on the engine would recharge the batteries to 100% in about 1 ½ hours. I monitored it by either checking the gauge or using the Victron app. If we were remaining in the anchorage, we would start the generator and turn on our 2 charges, which I will discuss later. The generator has a 10-AMP charger, the ProMariner 20 Amp 3-bank charger, and the 45 Amp Iota DLS-45 Power converter/ battery charger, all of which were wired directly to the house battery bank. It would take 1 ½ to 2 hours to charge the batteries back up to 100% from 75%.
The ProMariner 20 Amp 3-bank charger came with the boat, and we have it set to charge 20% to the start battery and 80% to the house bank. It has always worked well in the marinas and keeps all the batteries at 100% charge. The Kyocera 140-watt solar panel is controlled by a SunSaver Duo Solar Controller, which came with the R-27. I set the SunSaver to allocate 90% to the house batteries and 10% to the start battery, which keeps the batteries topped off when at anchor during a sunny day. The Sun Saver Duo Solar Controller has a remote meter located on the starboard wall just before entering the V-birth directly across from the generator, air conditioner, and Victron control panels. We added the 45 Amp Iota DLS-45 Power converter/battery charger for two reasons. First, it gave us a backup charger to keep the batteries topped off at a marina in case there was a problem with the ProMariner. Secondly, we needed a 45-amp charger that could be used with the 20-amp promarinar and the generator to charge the batteries quickly when we were on the hook.
To charge our various digital devices, we used a variety of car chargers that matched the device's specs. There are two such 12-volt cigarette lighter-type outlets in the front of the boat and one on the rear port side next to the door. We are also including a Bestek 300 W power inverter. We use this for anything small that we want to run at 120 volts. We have a cigarette lighter outlet in the back of the boat on the port side, and we plug it in to that and then plug in a power strip that will accommodate 110 volt plugs to power all of our digital chargers. Further, the Bestek has two USB ports that we can plug our digital devices into. So sometimes we use the power inverter at the front of the boat on one of the two cigarette lighter outlets up there to plug things in. We can also use the Bestek to plug in electric drills or any small electric appliance we just want to use for a short time. It is much more efficient to use this small 300-w inverter than the 1500-w True Power Inverter wired into the boat’s 110-volt wiring.
There are times when we are in Anchorage with boats nearby and do not want to run our generator. In that case, we will use the 1500-watt inverter to run either the stove top or the microwave for cooking. The stovetop has two burners, one at 600 W and the other at 900 W. The inverter can run either burner, but not both at the same time. The inverter will run the microwave, but we do not run anything else with it. Most of the electronics on the boat are 12-volt, so the inverter comes in handy, but we also have a generator, which we use far more than the inverter.
The generator is a Mase IS 2.7 and burns 0.21 gallons per hour, or less than a quart. It is housed in an insulated box also used as a step in the back cockpit. The control panel is located forward on the port wall entrance to the V-birth. The engine is an air-cooled single-cylinder Yanmar. The windings of the generator are raw water-cooled by a heat exchanger from a through-hull via a Johnson pump, and the water is exhausted along with the engine exhaust through a muffler system.
The main items on the boat that rely on 110 volts are the cooktop, microwave, air conditioner, and water pump. In most cases, the water heater will be heated by the engine. Usually, the water heater stays hot for about 12 hours. Therefore, in most cases, it is not necessary to start the generator to heat the water with the water heater. If we are in a marina, we will be hooked up to 30 Amp shore power, and all of our 110-volt system will run off it. The generator will run the air conditioner, but that is all. Therefore, if we run the air conditioning with the generator, everything else in the boat that we use will be 12 volts. It is possible to have the air conditioning on, powered by the generator, and use the inverter for cooking and other 110-volt appliances. The generator also has a 10-Amp charger, which will keep the batteries charged during use without leaving the actual battery chargers on the boat in the on position. The generator uses less than a quart of diesel fuel per hour, making it very efficient. The generator has been run for only 115 hours over 12 years of ownership. You can see that we do not use it that often. Most of the 110 hours are from running it every month or so for about 15 minutes under load. The generator control panel is adjacent to the helm, along with the air conditioner control panel and the Victron battery monitor and dongle.
There are 3 110-V outlets in the cabin: one above the galley sink, one underneath the dinette table, and one just inside the cabin door on the port side. There is an outlet in the head and another near the batteries on the starboard side in the cockpit, where I plug in the Battery Minder when the boat is on the lift. We have a 50-foot shore power cord that comes with its own case and mounting board for storage. (see pictures) There is also an assortment of pigtails for use with an extension cord, which I use when the boat is on the lift rather than messing with the 50-foot shorepower cord. A pigtail is also required for use at the RV Park when traveling.
Just to the right of where you sit or stand at the helm station are the 12-volt and 110-volt distribution panels. On the same wall is the Heater control. There is a radiator-type heater below the helm station floor, connected to the engine cooling system, that can be turned on, similar to a car heater, with low, medium, and high settings. We used it a few times while traveling the Mississippi River in Minnesota, but never in Florida! Also, there is a 12-volt AC rotary selector switch that has 4 settings: Off, Shore, Gen, and Inverter. Below that is a Lewmar windlass circuit breaker in the same area.
The Power Distribution Panel is located on the forward wall of the generator compartment. There are 4 red switches: parallel, thrusters, house bank, and engine. When the boat is on the lift, we keep all the switches in the off position. Below those switches are two large thruster fuses, housed in plastic cases, miscellaneous fuses, all labeled, and a 12-volt breaker for all dash electronics. On the rear of the generator compartment wall is the terminal for all grounds, along with the main 30 Amp 110-volt breaker panel.

The three house batteries are on the left and the start battery on the right. The water heater is on the left side of the compartment, and, from left to right over the batteries, are the fresh water pump, the Pro Mariner 20-amp charger, and the 1500-watt inverter. All the batteries are easily removed for service.

This is the BatteryMinder that charges all 5 batteries when the boat is on the lift.

The Victron Battery Monitor gauge is located on the wall to the left just before entering the V-Birth. It is the round bottom gauge with a black Bluetooth dongle to its right. It is connected to the shunt next to the batteries with an Ethernet cable.

The shunt from above with the cover on it. The upper right is the auto pilot and below it is the trim tab motor

The 1500-watt solar panel is located directly behind the decorative smoke stack. Has room underneath to tie down both foldable bikes.

The Remote Meter is adjacent to the helm station and provides a lot of information concerning the status of your Sun Saver Duo.

There are 3 12-volt cigarette lighter plugs on the boat. One is underneath the radio, and the other is next to the water gauge to the right of the chart plotter. This picture shows a splitter with two plug-ins that is included.

The Besttek 300-watt inverter also has 2 USB ports.

110-Volt power outlet in Head

110-Volt outlet under dinette.

The 12-Volt, 110-Volt, and their volt meters are to the right of the fire extinguisher. The upper right switch is the heater. It is like a car heater with a small radiator heated by the engine antifreeze. It is built into the step up to the helm seat. It has low, medium, and high fan control settings. The switch below controls the source of the 100-volt power. Settings are shore, gen, and inverter. Below that is the windlass circuit breaker.

The power cord is used when the boat is on the lift to connect to a 110-Volt extension cord. Included with the sale.

12-foot battery cables are not only for this boat but also to jump batteries between boats in an emergency.

This is the dinghy/house battery purchased in December 2021, which has had little or no use due to hurricanes. It is in the compartment where all the original batteries were on the port side. It is connected to the house batteries via a Canco Trac high-current 8-gauge connector. The battery is easily disconnected, moved to the Dinghy, and connected to the trolling motor that also has a Trac connector.

The BatteryMinder is attached to the toolbox, which sits on top of the batteries. Note the electrical outlet to its left.

The Victron shunt from above. There is a grey Ethernet cable that runs all the way to the Victron meter at the front of the boat. To the left of the shunt is a Blue Sea SI-ACR start-isolation automatic charging relay that protects the start battery from discharging in the event of a house bank failure.

The freshwater pump, ProMariner 20-watt charger, and 1500-watt inverter prior to batteries being relocated from the other side of the boat.
.png)
The terminal for the Sun Saver Duo is very accessible in the generator compartment, just above the generator exhaust.

The Iota DLS-45 Power Converter/Battery Charger is located behind the Dometic Refrigerator/Freezer. It is plugged in to a switched outlet, which needs to be turned on for use.

The 3rd 12-volt cigarette plug is located in the back of the boat just before the door. The red Bestek 300-watt inverter is normally kept on the floor, as pictured. There is a power strip on a shelf above the inverter that can be plugged into it for use. Note the power outlet.

The generator is housed on the port side, beneath a hinged step that provides access to the front of the boat.

110-Volt outlet in Galley.

Power distribution switches next to the generator and miscellaneous fuses. The switches are Parallel, Thruster, House, and Engine. When on the lift, those switches are kept off.

To the right of the power source control is the Deluxe Inverter Remote Controller.

4 more connectors included in the sale. The longer one with the yellow cord has the same combination as the stubby connector to its right. It comes in handy with certain power boxes in marinas. The last cord has a different connector for use in an RV Park in conjunction with the 50-foot shore power cord.

80-foot - 12-gauge extension cord that can be used in conjunction with the connection cords if a power cord is needed longer than the 50-foot shore power cord, to hook the boat up in a marina or an RV Park.
MISCELLANEOUS MECHANICAL UPGRADES
TRIM TABS
The 2014 R-27 has a semi-displacement hull designed for efficiency and stability, providing better stability at rest and in choppy conditions than pure-planing hulls. In 2016, RangeTugs started offering the R-27 with an outboard and changed the hull to a planing hull. The R-27 at speeds of 8 Knots and below 2000 RPM is very efficient, with fuel consumption of 6 NMPG, plus or minus, depending on wind and tidal flow. If the waves exceed 2 feet at 8 knots, the windshield wipers get a real workout. It is necessary to lower the trim tabs and increase the RPM to 3100 to reach about 12 knots. This pushes the bow out of the water, forces spray off the hull to the sides, and keeps the windshield dry. The boat is unique because the fuel burn is 2.1 NMPG, starting at 3100 RPM and 12 Knots, all the way up to 21 knots at 4100 RPM. If we wanted to cruise for an extended period at a fast cruise, we would run at 3400 to 3600 RPM, achieving between 15 and 17 knots. We had one issue related to the trim tabs. When the boat was topped off with 40 gallons of water, 100 gallons of fuel, a partially filled holding tank, and the dinghy, even with the trim fully down, the swim platform would drag in the water somewhat at speeds over 10 knots. I called Bennett Trim Tabs, and they were familiar with the R-27 issue. They told me that, ideally, a wider trim tab was needed, but due to the rear thruster, I had the largest one that could be installed. That is when I learned about drop fin sets. They came in pairs, with a drop fin attached to each side of both trim tabs. The drop fins will not let water escape from the sides of the trim tabs; instead, they hold it in, giving the trim tabs much more lift. It was not an easy install, and they work as advertised. It is much easier to visualize in the pictures that follow.
Thrusters
The thrusters are one of the R-27's best features. They are not meant to be used in heavy winds or seas but rather for maneuvering into a slip or dock. If you activate them any more than 3 seconds, you may very well blow the fuse. The fuses are high-amperage safety devices, and there are 2 spares on the boat. If it is windy, do not try to back into a slip; rather, go in forward. It is easy to back out. There is a remote for the thrusters, which comes in handy when tying the bow to pilings in certain docking situations, as you can use it from the front or back of the boat.
Windlass and Anchoring
The Windlass is a Lewmar 1000, which is somewhat of an overkill for the R-27. There are foot controls next to the windlass, along with controls at the helm station. There is also a breaker dedicated to the windlass mounted on the wall in the helm station near the DC and AC distribution panel. It came with a 16-pound Lewmar, a Bruce knock-off, and I swapped anchors with our 25-foot Bayliner, which had a 22-pound Bruce. It has 50 feet of 5/16 chain and 200 feet of 5/8 three-strand rode anchor line. I added a stainless-steel swivel to the anchor chain and three 5/16-inch links between the swivel and the anchor. This keeps the anchor from becoming bound up due to changes in wind or tide. It has a stainless steel self-launching pivoting bow roller that did not come with an anchor lock. I added a custom anchor lock; see pictures. There is also a leather chafe guard to wrap around the line on the bow roller, as I always keep at least 10 or 20 feet of anchor line between the chain and the windlass to absorb shock and cleat the line rather than running it through the windlass in heavy wind conditions. The anchor has never failed to hold or even drag, even in 50-knot winds and heavy seas, during the 12 years we have had the boat. The most important thing you can do to prolong the anchor chain's life is to remove the chain and any line from the chain locker after a trip and thoroughly rinse them. I cut out a piece of the green lift cover that got destroyed during Hurricane Ian to fit perfectly in the area adjacent to the anchor locker, so I could spread out the chain without damaging the deck. I could then rinse the chain and the line, let them dry, and put them back in the anchor locker. I do not store it on the boat. See pictures.
Raw Water Washdown
The raw water washdown is mounted on the port side of the boat, beneath the seat over the holding tank at the back. SW Florida has notoriously dirty anchoring grounds, and it is necessary to rinse off your anchor line and chain when pulling up the anchor. A 15-foot ⅝-inch coiled hose is used with a 25-foot ¾-inch flat canvas hose for raw water washdown during anchor retrieval. I take the canvas hose with a closed nozzle to the front of the boat, winding it loosely between handholds on the boat's top to keep it in place. When I have everything set to retrieve the anchor, I go to the back of the boat and turn on the raw water washdown; the hose fills with water, and I start retrieving the anchor, rinsing the line and chain as I bring it in. Once done, I pull the hose to the back of the boat, turn off the pump, and deflate it. I also use these same two hoses to rinse the boat off while in a marina. I always run fresh water through the canvas hose and let it dry before rolling it up for storage. It has a nylon bag for storage.
Air Conditioner
The air conditioner/heater is a Webasto Marine Comfort 16,200-BTU unit. We seldom used it unless we were in a marina and our 30-amp shore power cord was connected. The generator runs it just fine, but with all the opening hatches on the R-27 when at anchor, coupled with all our fans, it was always comfortable in the boat. In the evening, it cooled off, and the air conditioning was not necessary. We used the boat's heat a few times in a marina on our fall Mississippi River trip and a couple of times while staying at a marina in Florida from January to March, but otherwise it was always the air conditioner. The air-conditioner outlet was in the middle of the step leading up to the passenger seat. It was absolutely necessary to circulate the air in the cabin when either the air conditioner or the heater was running. That was one of the reasons for the 4 Caframo-Bora 3-speed fans. They were easily adjusted to ensure a circular airflow throughout the cabin. We also bought a 02 Cool 12-volt - 9” - 3 speed fan that we could set on the v-birth to blow air to the back of the boat during the day or put on the dinette at night and blow air into the v-birth. It was a very efficient fan and moved a lot of air. The control panel was on the portside wall just before entering the V-Birth, along with the generator control panel, the Victron Battery manager, and the Bluetooth dongle. The cooling water was discharged through the hull, just below the passenger window. The condensation from the air conditioner drained into the bilge and was pumped out by the rear bilge pump. A remote control is included with the air conditioner, but on a small boat like the R-27, it is really not necessary. The water pump was replaced in May 2024 as part of Hurricane Ian repairs.
Engine Water Strainer
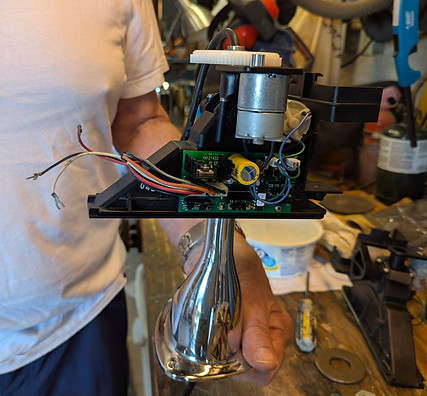
A new engine water strainer was one of the most important changes we made to the boat, and it was necessary. I first complained to Andrew, the service manager at Ranger Tugs at the time, on November 17, 2015, about an overheating problem. At the same time, I contacted Volvo Penta of the Americas and was connected with Filipe Borges in customer service. At the time, no one knew what the problem was, and it was not until February of 2017 that I came across a thread on Tug Nuts, a site set up for Ranger Tug owners to ask for assistance with problems with their boats, that solved it. Prior to that, I struggled with the problem, writing numerous emails and making numerous phone calls with both Andrew and Filipe. If I increased the speed much above 3250 RPM, the engine temp right up to 190. If I increased the RPM to 3600, the temperature would rise to 198, and after a minute or so, it would be well over 200. The high temperature alarm goes off at 208 degrees. That meant I had to cruise at 3200 RPM, or about 13.5 knots, to keep the temperature where it should be.
Up until the 2014 model year, all the engines in the 27-Rangers were Yanmars. When Ranger switched to Volvo Penta, they decided to continue using the same water strainer used with the Yanmar and left it in the same location in the engine compartment. That particular filter was a Multi-Port Intake Strainer with one -1” NPT and two - ¾” NPT Outlets. It had a flow-through design that allowed water to tumble horizontally across the perforated stainless steel screen, where debris was agitated and chopped into small pieces. When this “processed” debris is small enough, it would pass through the holes in the screen; it was supposed to pass easily through the water system and be exhausted overboard without issue. The two - ¾ NPT outlets were connected to the Head flush and the raw water washdown pump. The 1” NPT was connected to the engine. With the Yanmar engine, the hose was about 2 feet long and went directly into the raw water pump. When they put the Volvo Penta in, the hose was 9 feet long, went all the way around the front of the engine to the back, connected to the transmission heat exchanger, passed through it, and traveled 4 more feet to the front of the engine before reaching the raw water pump.
After much research, I determined that there were 3 things to adhere to most closely when connecting the engine to the raw cooling water. The strainer and the through-hull had to have at least the same inlet and outlet sizes as the engine's cooling hoses, which were 1 ¼ inside diameter. The through hull and the strainer on the boat had a 1” inside diameter. The engine, through-hull, and strainer had to be dedicated to the engine, whereas the strainer also serviced the head and the raw-water washdown. It was also common knowledge that the hose from the strainer to the engine had to be as short as practicable, not 9 feet long as it was on our boat. We discussed these issues, and Andrew from Ranger Tugs said Ranger had 700 boats set up that way, and he did not see a problem. Filipe recognized the issues and sent out feelers to his technical section. It was not until February 2017 that I discovered a thread on Tug Nuts from the owner of an R-27 that had the same problem. He was in Marathon in the Keys, and had a mechanic come and look at his boat. The mechanic pointed out the same problems I had been complaining about, but said the type of strainer on the boat probably let through a bunch of seagrass that clogged the transmission heat exchanger, which was probably causing the overheating. He took the hoses off the transmission heat exchanger and back-flushed it. It was full of seagrass, and the mechanic told him he needed a better strainer dedicated to the engine close to the inlet for the transmission heat exchanger. He said he followed their advice, and since then, the overheating has no longer been an issue. I sent the thread to both Andrew and Filipe, and they started discussing the issue. In March of 2017, after learning about the issue with the transmission heat exchanger, I removed the hoses and back-flushed it. A large amount of grass came out. Our next trip was in April 2017. We checked the engine temp at all speeds, and it was back to normal. I let both Filipe and Andrew know that, and we all agreed we found the problem after 2 years.
Filipe took the lead, called me at the beginning of May 2017, and asked if it would be OK to work with Diversified Yacht Services, which is a certified Volvo Penta repair facility. I told him that would be fine. He contacted Diversified, and Scott from Diversified contacted me on May 15, 2017, and scheduled a time to come to my house to look at the boat. Scott recommended a Groco BVS-1250 Valve/Strainer Combo because it had a smaller footprint, with the strainer mounted on top of the valve. The problem was that it had to be installed next to the Air Conditioning through-hull that had a built-in hull scoop, which had to be removed and replaced with a through-hull without a scoop. The air-conditioning through-hull and the through-hull for the new Groco Valve/Strainer would share a large Groco ASC 2000 Hull Strainer. Scott had to put a plug on the 1” inside diameter outlet that the Volvo Penta was connected to. Even though the head and raw water washdown remained connected to the strainer, it was not a problem, as the pumps could handle a little grass. Scott completed the repairs on October 12, 2017. We took a 10-day trip in the first part of November 2017, covering 240 miles and putting 20 hours on the engine, with no overheating issues. We have been taking many lengthy trips since then with no overheating problems. I never found out if it was Ranger Tugs or Volvo Penta that paid the $4,655.62 bill from Diversified, although I suspect it was Volvo Penta.
_JPG.jpg)
Trim tab before removal from the boat to mount the drop fins.
_JPG.jpg)
Starboard trim tab with drop fins installed after bottom paint application.

The thruster fuses are located below the red thruster [power switch next to the generator. The inverter Fuse is located inboard of the batteries in the battery compartment. Fuses are stored in a bin under the dinette.

These zincs and parts are not stored on the boat. The boat needs to be out of the water to replace them.

_JPG.jpg)
Drop fins attached to trim tabs with primer applied before bottom paint.

On the left is the remote control for the thrusters. On the bottom right is the mounted thruster controls. If you are using the remote control outside the boat, be sure to wear the lanyard over your neck!!

Thruster Shear pins and wrenches stored in a bin under the dinette.
_JPG.jpg)
The anchor lock is attached to one of the three added links. The third link is attached to the stainless steel swivel.

A leather wrap is used to protect the anchor line from chaffing from the bow roller. The stainless steel wrench is for the windlass and is stored in the white nylon case.
Heavy green vinyl cut out to protect the non-slip during cleaning of the anchor chain and line. Green vinyl not stored on the boat.

22-pound Bruce anchor on bow roller.

The white flat canvas hose is stored in the white nylon bag and the nozzels are kept in the storage area under the seat at the back of cockpit. The clear nylon hose along with the green coiled hose are stored outside and the back of the rear seat.

Storage area under the rear seat. The nylon bag with the rolled up canvas hose and nozzels are behind the red pail.
_JPG.jpg)
Air conditioner air intake under the dinette in the storage area.

O2 Cool, 9-inch, 3-speed, 12-volt fan used to circulate air from the air conditioner.

The new yellow air-conditioning water pump has the bottom hose running to the through-hull, with the top hose running forward to the air-conditioning unit.
_JPG.jpg)
The engine was originally hooked up to this water strainer. The through-hull is on the left; the white outlet hose goes to the head; the black hose with a green strip ran 9 feet around the front of the engine and was connected to the transmission heat exchanger; and the clear outlet hose goes to the raw-water washdown pump.
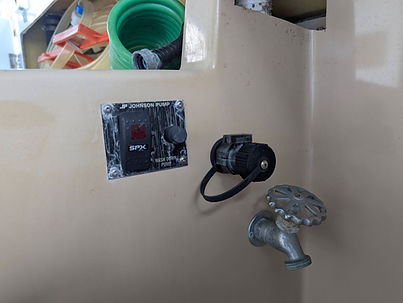
The rear port side of the cockpit has the faucet and switch for the raw-water washdown, both in black. The stainless faucet is a freshwater outlet from the boat's tank.

The air conditioning vent is built into the stairway under the passenger seat.

The top control is for the air conditioner/heater. There is a remote control, but it is not necessary in the smaller boat.

The 110-volt wire from the previous picture, which comes from the air conditioner controller near the helm station, is shown along with a black wire from the motor entering a grey waterproof box, and the wire is tied to a hose per code.
.png)
In the bottom center of the picture is the silver transmission with the black heat exchanger on top. Connected to the heat exchanger is the black hose with a green stripe, which runs 9 feet around the front of the engine from the original engine water strainer.
.png)
_JPG.jpg)
Once I discovered that the clogged transmission heat exchanger was causing the engine overheating, it had to be backflushed. The green hose on the lower right is city water and runs through the clear hose, backward through the heat exchanger, into the red bucket. I told Volvo Penta and Ranger Tugs that without a new strainer, I would continue to have that problem due to the seagrass in Florida.
This is the amount of seagrass removed during the backflushing. After seeing this, Volvo Penta contacted Diversified and authorized the new strainer for the engine, a new through-hull for the generator, and a large hull strainer for both the engine and generator through-hulls.

This shows the strainer that the engine's raw water hose was originally connected to, with a plug in the output after the 9-foot hose was removed. The white hose is connected to the head, and the clear hose is connected to the raw water washdown pump. Even though this strainer lets through sea grass, it is OK to use in the head and raw-water washdown, as the impellers in both pumps can handle it.
_JPG.jpg)
The tall glass strainer is the Groco Valve/strainer that has the through-hull and valve under the strainer due to space constraints. The grey strainer to the right of the Groco is for the air conditioner water pump, and the through-hull is located directly to the right of the Groco strainer. That through-hull had a built-in hull scoop, which had to be replaced with a standard through-hull. The grey strainer to the right of that was for the generator and had a regular through-hull, with no scoop, which is OK for the generator.
_JPG.jpg)
The air-conditioner through-hull with the built-in hull scoop is shown on the left, and the standard through-hull for the generator is on the right.
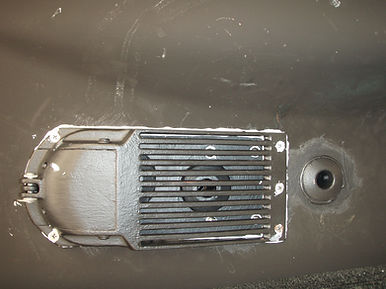

The 1 1/4-inch Groco Strainer/Valve through-hull is on the left, with the 3/4-inch air-conditioner through-hull in the middle, and the 34-inch generator through-hull on the right.
It was necessary, because the Groco Valve/strainer through-hull was so close to the air conditioner through-hull, that they had to share a large Groco ASC 200 Hull strainer, as shown in the picture.
MAIN CABIN
Before purchasing the boat, we saw several at different boat shows. Therefore, we knew what we did and did not want included in the boat's main cabin before ordering it. We knew that we did not want a propane stove with an oven, as we never used the one on our catamaran sailboat in the 8 years we had it. This meant we did not want any cutouts in that area for a stove and oven. The stock boat came with a small microwave built into the dinette below the front dinette seat, and they were asked not to cut out a hole for it. Those were the only physical changes made to the stock boat.
The boat was designed with a claustrophobic sleeping area under the dinette, which we knew we would use for storage. The storage boxes can be accessed either through the back of the dinette or via a custom access opening with a door under the forward dinette seat. Directly above that is another door where the small microwave was designed to go. We cut out an access opening with a door, just like the storage area access door, which we used for storing clothes on trips. The seat for the dinette did double duty: it could be flipped up to serve as a forward-facing seat for a passenger to look out while underway or to watch TV in the evening. Directly below the seat, there was space to add a storage drawer with a face that matched the other doors and the wood in the boat. There is a glove compartment right across from the passenger seat that we built shelves into to hold our logbook and other important papers. When open, the glove compartment door could be used as a small table. On the table in the stock boat was a teak beverage holder that I removed and mounted on what I will call a dashboard that was above the glove compartment. At the helm station, there is also a dashboard above all the instruments, where the compass, cell phone dock, tablet dock, LED flashlight with a custom mount, and Garmin GPS 72H are mounted.
Above the dashboard, there is a storage space between the top of the windows and the cabin ceiling on each side of the boat. There are openings on each side, and I added a door over each opening that opens and looks like the other doors I put in the dinette. There are fans that blow on the windshields on each side of the boat, built into that storage space. I believe these are exhaust fans for cold weather, keeping the windows defrosted. I never used them, and that is not an issue in Florida. The TV fits between these two spaces and has a mount that folds it up to the ceiling for storage or down for watching. In the space to the right of the TV is a power unit for the ariel that Ranger Tugs had wired in an always-on position. I added an on-off toggle switch with a red light to indicate when it was on, so I could turn it off when not in use. The TV was used only occasionally, and it made no sense to keep it on, even though it drew little electricity.
Above each, the passenger seat and the helm seat, was one fully adjustable Caframo-Bora 3-speed Marine fan. We use the fans to blow air on the passengers and the captain while traveling, particularly when it is raining or the boat is in rough seas, which can cause water to splash into the cabin windows or the hatches, and it is necessary to close the windows and the hatches above the passenger seats and the captain's seat. The fans do a great job of keeping things cooled off.
There is a First Alert combination carbon monoxide and smoke alarm mounted in the main cabin ceiling, battery-powered and easily disconnected when the boat is not in use.
There are 2 Kidde fire extinguishers. One is located next to the helm seat, and the other on the port side inside the rear door.
On the wall next to the same steps, next to the air conditioning vent, is a yellow wall-mount case that holds Blue Water Marine Binoculars - Waterproof - Fog-Proof - Nitrogen-Filled - Multi-Coated Lenses - Center Focus 7 X 50 - Field of View 392 feet at 1000 Yards. These are excellent binoculars that we used all the time and were easily accessible to the helm station.
In 12 years, we have never had another couple overnight on the boat. The dinette table is on a hydraulic piston and can be lowered and used with a filler pad to sleep two, but not recommended unless they are a couple of children. We always carry the filler pad with us and store it in V-birth underneath the bedspread. Occasionally, when watching TV, we will lower the table so we can relax on the filler pad.
The V-birth is 6’5” deep and wider than a king-size bed. When the bed is made up, a custom foam sleeping pad is placed on top of the cushions. There are custom mattress pads and custom sheets that are clean and can also serve as templates for extra bedding sets, as no bedding is designed for this V-birth. It is very comfortable and works well for crawling out to the head without waking each other. That was not the case with our large catamaran: the queen-size bed ran across the boat, and to get out of bed, you had to crawl over the other person!!! There is one Caframo-Bora 3-speed Marine fan mounted at the front of ot the V-birth. There is also a shelf behind and above the fan, designed to hold a SHARP-LED digital clock with a colored lens so it would not be too bright at night. There are built-in LED lights on each side of the V-birth. There is a two-drawer plastic clothes storage box located on the floor under the overhang to the entrance to the V-birth. Behind and adjacent to the storage box are 4 basic orange life vests.
The stock boat, in the area between the dinette and the back of the boat on the port side, had a seat attached to the side of the boat that folded down to serve as a seat at a small table designed for computer work. With the chair folded up, access to the sleeping area under the dinette was possible. We were never going to use the sleeping area under the dinette, nor the fold-down seat. We have it in the garage, and if you decide to buy the boat, you are welcome to it. The small desk had a fold-down portion on hinges that, when down, would support a laptop. There is no way anyone would want to sit in this small area and work on their laptop when you have the Dinette table, almost adjacent to and above it, to use. We removed the fold-down portion if anyone wanted it.
There are four large plastic boxes that fit under the dinette for storage. The front 3 feet of the storage area contains smaller plastic boxes for clothes, shoes, etc., and is accessible through the opening in the side of the dinette. Everything in the large storage boxes is part of the sale and will be listed separately. On the wall where the chair was, there is a Naugahyde sleeve that holds the canvas and sunshade window coverings for the boat's windows and door. In the area between the Naugahyde sleeve and the aisle, the Dometic Refrigerator ended up. It was easily accessible, and the large storage boxes could be removed from underneath the dinette right over the top of the Dometic. In this area, many stainless steel hooks were available for hanging hats and clothes. A special clothes rod was mounted on the back of the dinette to hang jackets. On the back wall of that area is a 6-drawer plastic case containing fuses, a voltmeter, tape, Velcro, a tape measure, and more, all listed with pictures. In addition, a Mag-Lite is mounted on the wall in the same area. It is waterproof, nearly indestructible, uses 3 D-Cell batteries, and has a zoomable beam. There is also a Braun slim bar rechargeable LED light stored on the small shelf behind the power strip, just to the left and above the Dometic refrigerator/freezer. The power strip can be plugged directly into the 110-volt electrical outlet or into the Bestec 300-watt power inverter.
On the outside of the head door, we mounted a .030” (22 gauge) #8 stainless steel mirror, 12” X 48”, with commercial cement. It is easy to clean, rugged, and you would never know it was not a glass mirror. My wife uses it all the time and is very happy with it. One of the reasons we wanted this boat rather than some of the other Ranger Tugs we considered was that the head was not crammed into the area adjacent to the V-birth. It was separate in the rear starboard corner of the cabin. The only downside to that was that it somewhat blocked the view from the helm station when backing into a slip. To address the backing issues, we have two stainless steel mirrors, one on each side of the boat's front railing. We have some friends who have installed a camera at the back of the boat that can be wired to their GPS display. The mirrors work great, and it is one less electrical device to fail!!
We enjoy showering on the boat even when in a marina. The boat has a sump that pumps the shower water out. Ranger Tugs says you don't need to cover the walls, but we decided to. We purchased an oversized nylon shower curtain designed to hang in the corner over the toilet. When taking a shower, it would be unfurled and hung on brass hooks covering all the walls, the toilet, and the sink, except for a portion of the rear wall, where we had mounted dispensers for body soap, shampoo, and conditioner. The dispenser was a Simplehuman Triple-wall mount pump and works well. The nylon curtain usually dries within an hour, and then it is returned to its storage position. The head had its own ventilation hatch, screen, and sun reflector.
The main cabin has three screened opening windows on each side of the boat. Those windows came with drapes, but we felt it was necessary to line those curtains to protect them from the sun, which my wife did. There are 4 non-opening windows across the front of the boat, all with windshield wipers, and they are built really tough to withstand heavy seas across the bow. The four windows share one tan canvas cover that snaps onto the frames. It remains on when the boat is on the lift or being pulled with the trailer. In the back, there is a non-opening port-side window with a tan canvas that velcros to the inside of the window frame. The back also has a full-opening, heavy-duty glass door with a tan canvas cover that velcros onto the inside of the door. There are identical white sunshade/privacy covers that snap onto the front windows and Velcro onto the inside of the rear window and door. These are used in a marina or when anchored out to keep the sun out and for privacy. During the day, they keep direct sunlight out and prevent people from seeing into the boat, but they do allow those inside to see out. We designed, and my wife made 4 Blackout naugahyde curtains for the 4 front windows. The curtains hang on brass hook eyes inside the windows. They can be adjusted to cover only the top ½ of the window, similar to lowering your car's visor. We use these in Marinas because at night they provide privacy and can be put on and taken off quickly. They are also great for anchoring, keeping the early-morning or evening sun out of the boat. (see pictures)
One of the most important things the boat did not offer as an option was a rear door screen. After much research, I found a company in Texas, Plisse Screen, that specializes in retractable screens. The screen had to be placed inside the cabin, and the opening was about 20 “ wide and 70 “ tall. The owner of the company was extremely helpful, and in this age of digital cameras and the internet, he did not take long to design a door that worked perfectly. It came out so well that a lot of my friends with Ranger Tugs have purchased the screen door. The door lasted 10 years before it needed to be restrung. The screen was fine, and I just needed a re-string kit for a single-door retractable screen for $55, which I did in August of 2024.
The R-27 has 7 opening hatches in the boat; 5 in the main cabin, 1 in the head, and one in the V-birth. All of the hatches came with screens, but none included a sun reflector, which is essential in Florida. I had just installed a wood floor in one of the rooms in the house. Before laying the floor, the underlayment had to be installed. The underlayment was black foam about an ⅛ “thick with heavy aluminum foil on one side, which was laid aluminum side down over the concrete slab to prevent moisture from getting up into the wood floor. I had a lot left over, so I cut out pieces to cover the screens. Then I would place them over each screen, aiuminum side up, and put the screen on the hatch. I have had them on the boat for 12 years, and they are still in perfect shape, keeping the boat much cooler.
All of the lights in the boat are LEDs. There are two sets of LEDs mounted in the cabin ceiling, running fore and aft. One set is white, and the other is red. The switches for the white and the one that controls the cockpit light just outside the rear door are just inside the rear door. The switch for the red lights is on the 12-volt circuit panel next to the helm station.. There is a fixture with two lights on the wall adjacent to the dinette and another straight across the boat in the Galley. There are two small lights, one on each side, in the V-birth and two more in the area between the dinette and the rear of the cabin. There is also a ceiling light in the head, with the switch located on the light itself.
There are two custom-made towel covers for the helm and passenger seats. They have been on the seats since the boat was new, except when they were washed.
_JPG.jpg)
This is the area where a stove-and-burner combination would be installed. We ordered the boat without a cutout so we could install a stove top, full-size microwave, and an additional drawer under the microwave. More pictures will be in the Galley section.

This was designated as a sleeping area under the dinette. Only 2 1/2 feet tall and claustrophobic. We made it into a storage area.

This is the storage area, showing all the storage boxes from the back of the dinette to the front. For reference, you can see the metal shelving at the top of the picture. The blue top boxes are readily accessible and ia where items are stored that are used on a regular basis.
_JPG.jpg)
This is the dinette under the front passenger seat. In the stock boat, there was a small microwave toward the top. We ordered the boat without the microwave or any cutouts. The holes are cutouts to add storage to the boat, and each will have teac-like doors that open.

This is the storage area under the dinette with the storage boxes in it. The picture is taken from the access hole at the front of the dinette toward the back. I will discuss one box at a time.

This is one of the long boxes with a white cover
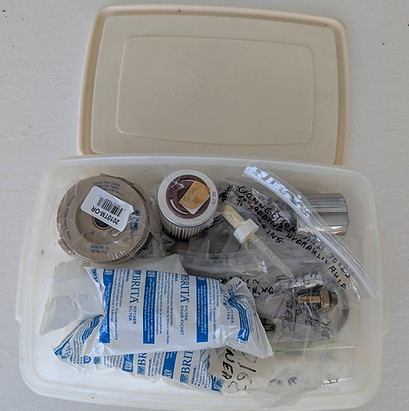
This is a picture of what is in the white top box at the left of the preceding picture. There is an engine fuel filter, a generator fuel filter, and three Brita water filters.

There are two unlabeled items: the large silver 36mm socket for the engine oil filter and a new impeller for the generator water pump.
The following area includes additional pictures of what is in this box

Two Volvo Penta belts

Extra generator fan belt

Assorted Stainless hose clamps and hoses,

Nigel Calder manuals.

Assortment of stainless steel fasteners for repairs


New engine oil filter element
New engine fuel-water separator.

This is what is in the other white top box. These items need to be kept on the boat. There is ample room for more items in this box if necessary

This is the other blue top box with a lot of room for more items.

These are storage shelves we added to the rear of the dinette for easy access. One thing we stored there was a squeegee for all the windows, which is included.
_JPG.jpg)
This shows the doors to the storage areas on the side of the dinette and the drawer to the right, which were added.
_JPG.jpg)
The large top storage compartment under the forward dinette seat. All hardware on the doors and drawers that were added is stainless steel.
_JPG.jpg)
This is a storage area above the windshield on the port side, with an identical one on the starboard side. Note the black plastic storage bins that are included in both storage areas. I made doors for both areas, as it looked unfinished without them.

This is what I call the glove compartment in front of the passenger seat. I added two shelves to store logbooks, notepads, etc. At the top right of the shelf above the glove compartment is a 2-cup drink holder mounted on the open glove box door, which can now be used as a small table for eating. I mounted the drink holder, and it looks nice and works well.

The white Kidde fire extinguisher is mounted in the helm station.

Blue Water Marine binoculars and their yellow case are mounted adjacent to the air conditioning vent.

The table is in the full down position, ready for the white naugahyde foam filler to be inserted.

This is the V-birth with the stock cussions and brown bolster removed.
Assorted wire.

Spare wipwe blade

New engine raw water impeller.

Engine fuel filter wrench.

A bottle made to hang above the hydraulic steering to facilitate adding hydraulic fluid.

Spare tranmission filter O

Blue top box with ample room for more items.

This is white duct tape that is kept in a sealed container, which is stored in an accessible box because it could be used for all types of repairs

This is storage accessible through the door at the front of the dinette. We used the two larger bins for clothes and the smaller bins to the left for shoes. There is a bin behind the two larger ones that has 5 rolls of special toilet paper for the head.

The drawer in the open position
_JPG.jpg)
This shows the door to the large storage area under the dinette. Note the carpet on the walkway floor. The wood floor in the dining area is the same as the walkway floor when the carpet is removed.
_JPG.jpg)
This is the door in the closed position, and it looks much better. The fully adjustable Cafromo Bora 3-speed fan can be used to cool passengers or circulate air in the cabin. The same fan is adjacent to the helm seat on the other side of the cabin.

The First Alert carbon monoxide and smoke alarm is mounted in the middle of the cabin. The battery compartment pops up when the boat is not in use and is pushed down when in use.

This shows the other Kidde fire extinguisher in the portside rear area of the cabin. The black Mag Lite, a heavy-duty knife, the power strip, and assorted flashlights can also be seen.

Dinette table in the open position. Note the stainless steel hydraulic piston, which it is mounted on and can be moved up and down.

The filler pad is inserted, and the dinette can be made up as a bed. We never did that, but occasionally used it when relaxing and watching TV.

Starboard rear storage area after moving the cushions. same thing on the port side. We kept diving equipment in them.

On the far left is a storage area with a wooden floor. We did not use this area for storage as the bow thruster is under the floor. The area to the right is open to the cabin and just below a couple of cushions. The six uncluded life jackets are stored there along with the two-drawer storage for clothes.

The brown bolsters have to be removed to access the storage under the cushions or make the bed.

The underside of the foam sleeping pad is very comfortable.

Once the sheets are on, replace the bolsters, smooth them out, and place the dinette filler pad on top.

Foam filler is stored on the foam sleeping pad and then covered with the bedspread when the sheets and mattress pad are removed between trips.

The sheets are stored in the upper dinette storage compartment.

This is the storage area for the Fire extinguisher, 15-foot extension cord, MagLite, and Bestek inverter. Right above the inverter is the 12-volt cigarette plug socket.

This shows the padded seat for the Dometic refrigerator/freezer, with a naughyde case for storing the canvas and sunshield window coverings behind it. There are a lot of hooks to hang hats, etc., along with a clothes rod with hangers, and a bungee cord to hold the hangers in place. In the upper left is a storage box. There are two large shelves on the right and two throwing devices on top of the blue boxes below them.

This is a filler that fits in between two bumpers on the bow of the boat. That makes it much easier to winch the boat onto the trailer.

This is the mirror with a protective cover being glued onto the head door.

This is the shower curtain in its storage space behind the toilet.

The shower curtain covers the window and extends up to the shower head.
All 6 opening inside windows are lined, and they offer a lot of UV protection.

Canvas covered front widows shown from inside the cabin.

Canvas and sunshades for front windows, back door, and back window.

This shows the versatility of the curtains. They are meant to be all the way down or halfway down in any combination or order that you desire.

The screen door is 1/2 open, and you can see the handle about 1/2 way down the door, which sticks out to far to go on the outside of the door.

This is one of the seven hatches in the cabin. You can see that no sunlight is getting into the boat, and what you see is the black rubber bottom of the aluminum-foil reflector that is on top, facing up, keeping the boat cool.

This is the screen and the sun block being lined up before locking it in position.


The access to the bow thruster is under the wooden floor.

Foam sleeping pad on top of cushions.

Mattress pad goes over foam pad, then sheets. and then bolsters.

Next, put the bedspread on, and notice the filler pad underneath. We always put a towel down and put the cockpit table with its canvas cover on top of it.

The mattress pad is stored in the lower dinette storage compartment.

This is the rear compartment that has a top that folds down, giving the cabin more counter space.

Shows the same as the last picture with the addition of a heavy-duty knife, the power strip, and 2 more flashlights.

In the storage box are fuses, a voltmeter, a tape measure, a case of small screw drivers, and a custom-made space filler for the front of the boat to be used when trailering.
_JPG.jpg)
The filler goes between the wider black bumper behind the anchor and the smaller black bumper above the bow roller. It is held on by the bungee cords, which attach to cleats behind the windlass.
_JPG.jpg)
The mirror is mounted on the head door.

The shower curtain is going to the left over the medicine cabinet and then covering the inside of the door.

This picture is taken through the door, the inside of which would be covered if you were using the shower. The portion of the wall with the three soap dispensers is the only area not covered while showering.
_JPG.jpg)
This shows the canvas on the outside of the front windows.

Canvas covers velcroed on the rear door and the rear window.

These are the 4 black out Naugahyde curtains for the front windows that roll up, fit in the case, and are stored behind the bolster in the V-birth.
_JPG.jpg)
This is the screen door closed from the inside of the cabin.
_JPG.jpg)
The ball, typically used with Bungee cords, is used to open and close the door from the outside. It allows the outside heavy glass door without interference.

This shows the sun block for the screen, with the aluminum foil side up, before being snapped in under the hatch.

The 4 red and 4 white LED lights are lined up on the ceiling. The white lights have a switch inside the rear door, and the red lights are controlled in the helm station.
The LED light in the head with the switch on the side.

Custom towel cover for helm seat.

Custom Towel Cover for Passenger seat.
GALLEY
The boat was ordered without a cutout for a propane stove and oven in the galley, so we could install an electric cooktop on the counter and a full-size microwave under the counter. Under the microwave, we built in a large drawer to increase our galley storage. The microwave and the stove top will work with the 1500-watt inverter or the generator.
There are four ventilated compartments below the sink for storage. Below the Microwave and storage drawer is a large storage area for larger items. The countertop size can be increased by tilting the helm seat forward and/or placing a custom cutting board over the sink. Directly behind the sink are a couple of shelves for storing items. Underneath the lower shelf, we added 5 small drawers for kitchen-related items. There is a Caframo Bora 3-speed marine fan, like the other two in the cabin, over the passenger and helm seats. This fan is also fully adjustable, directly above the sink and across from the dinette.
There is a stainless steel splash guard to the right of the stovetop, and directly above it is a custom-made dish and silverware storage rack. It includes 4 sets of Corelle square dinner plates, luncheon plates, and soup/cereal bowls. In addition, 4 sets of stainless steel silverware and assorted knives and cooking utensils. There are 4 tan placements on a shelf below the window in the galley that are non-slip and work well on the dinette table.
In Florida, it is humid year-round, but especially so in the summer months. We needed a small dehumidifier that would run continuously on 110 volts and not need to be emptied. We found the EVA Dry Model EDV 1100 - 120 volt. It had a 16-ounce reservoir, and I built a ¼-inch drain with a hose into the middle of the reservoir so that, once there was 8 ounces of water in it, it would drain into the sink. It sits right next to the sink on the counter, with the hose running into the drain. It is supposed to remove 8 ounces of water today, and it appears to do so. It was left on continuously while the boat was on the lift and put in storage while we were cruising.
_JPG.jpg)
This is where the stock boat has an electric or propane stove and oven. We ordered the boat without either of those and requested that there not be any cutouts. The top cutout we made was for a 2-burner stove top, and the larger cutout below it was for a full-size microwave.
_JPG.jpg)
The top cutout is where the microwave goes, with a shelf for it to sit on. The cutout below that is where the large drawer will go. You can see the stainless-steel extension side-drawer slides that will be attached to the drawer.
_JPG.jpg)

The large drawer has a large and a small pan, matched to the cooktop burners. There are many cooking utensils and other related items that all go with the sale.
This shows the stove-top, microwave, and large drawer after installation. There is a door below the large drawer that opens downward, is very deep, and we used it to store soda, beer, water, etc.

These are two of the ventilated storage compartments just to the right of the refrigerator. The top one has the GE refrigerator/ice maker filter for the faucet to the left of the sink. At the bottom, the black cage covers a fan that can be turned on to cool the refrigerator compressor when it is really hot.

Below the sink are two more ventilated storage compartments. The top one has a plastic box that we line with grocery-store bags, and it is our garbage box. When it gets full, we just store it under the seat in the cockpit until we get fuel or stay at a marina and throw it in a garbage can. The bottom compartment is for general storage, and in the back left is a red Kleenex box, with another white one below it filled with grocery store bags.

The cutting board normally sits left of the sink, but is designed to fit over the sink to provide more counter space. Directly behind the sink are 5 small drawers for kitchen-related items that we modified to fit under the shelf above.

This shows the five small drawers pulled out. We used it to store clothespins, twist ties, rubber bands, and other small items. On the shelf above is an assortment of dish soap and hand soap, and on the left is a paper towel holder and another Kleenex box filled with grocery store bags.

This shows another Caframo Bora 3-speed marine fan in the galley, fully adjustable. To its right is the custom-made dish-and-silverware storage rack.
The galley counter can be extended by folding the helm seat forward.

I couldn't find anything that fit or looked right on the boat, so I decided to make one.
_JPG.jpg)
This is the finished product, stained and filled with dishes, silverware, and assorted knives and utensils, all included.

This shows the white EVA Dry EDV 1100-120-volt dehumidifier model. It holds 16 ounces of water, but when it is filled, it turns off. We wanted to run it all the time when it was on the lift. I modified it, and you can see the orange 1/4 inch hose coming out of the middle of the water container, which I put in at about the 8-ounce level. It has always kept the boat mold-free. We just remove it from the boat when we go on a trip.
REFRIGERATION
Instead of the stock Nova Kool model with a top freezer across the top of the refrigerator, we ordered the boat with a Nova Kool R4500 refrigerator only, no freezer.(4.3 cu. ft.). (122 Liters) volume. This allows for a much larger refrigeration volume. Before ordering the boat, we decided we would install a Dometic CF50-52, 1.7 cubic feet (48 Liters) refrigerator/freezer to use as a freezer for ice and frozen food. We placed it in an insulated box with a foam seat, positioning it between the dinette and the back of the cabin. It is extremely efficient and keeps the food and ice at 0 degrees Fahrenheit, right where we set the temperature.
The Ranger Tug factory is located in Seattle, Washington, where the climate is significantly cooler than in the southern US, and ventilation for the refrigerator was almost nonexistent. When the boat was first delivered in 2013, we used it at 90 degrees outside temperature, and the refrigerator would not cool below 40 degrees. We called Nova Kool, and they immediately knew what the problem was. They asked us to remove the refrigerator, place it in the walkway, and run it. We did that, and the temperature immediately dropped to 15 degrees, and even lower when we moved the thermostat down. Nova Kool suggested we enlarge the hole that the refrigerator fits into by 2” on the bottom and put 2 - 2x4s at the bottom of the refrigerator to allow air flow below the refrigerator. They recommended installing a Bronze vent in the Galley Counter, behind the refrigerator to the right of the helm seat, to provide airflow over the refrigeration coils. We added that, and it works great. In addition, they sent us a 12-volt computer fan to mount in the wall of a vented storage area adjacent to the refrigerator to blow air on the condenser if the temperature in the boat got really high. In the 12 years we had the boat, we needed to run that fan only a few times. We added a small 12-volt computer fan at the top of the refrigerator, inside, and directed it at the cooling plate to circulate air. Since then, little or no frost has been noticeable on the cooling plate, and the interior temperature remains uniform throughout the refrigerator. (see refrigerator pictures)
We use the Dometic refrigerator/freezer as a freezer only. The temperature control can be set between 0 degrees and 50 degrees Fahrenheit. We always have it set to 0 degrees. It has a divider that splits the storage area 50/50. In one half, we make ice before we leave on a trip and put it in one-gallon freezer bags. We take 4 bags with us and have never run out of ice on a 3-week cruise, which is our normal cruise length. My wife prepares meals in advance and freezes them. We put these in the other half of the freezer, before eating, let the meal defrost as we would at home, and when it's ready, heat it up in the microwave.

Nova Kool refrigerator with no built-in freezer. The black front just to the left of the refrigerator and below the step is a heating coil from the engine cooling system, powered by a fan. The control is the top one of the three switches on the wall next to the helm seat. We used it on the Mississippi River near Minneapolis, and it worked great, but it was not needed in Florida.

This is the inside of the door, showing a Brita water purifier and two water bottles, which are explained in more detail in the water system section. The area above is designed for cans and works good.

As explained above, Ranger Tugs left little or no ventilation behind the refrigerator for cooling. It was necessary to add a bronze vent at the back of the refrigerator, as shown, and to cut out 2 inches below the refrigerator to allow air to flow under it past the cooling coils and out the vent.
_JPG.jpg)
This is the fan Nova Cool sent me to install so it would blow on the compressor, which was just on the other side of the wall.

The switch to the right of the refrigerator turns the fan on and off. The red light is on when the fan is on. It is wired into the refrigerator circuit, so if the refrigerator breaker is off, the fan is too.

On each side of the Dometic, 3 velcro fasteners hold the top/seat in position when traveling.


This shows the refrigerator open. It is easy to keep clean and has lots of space for food and beverages.

This shows a small computer fan in the upper-right corner, wired to turn on with the refrigerator. The on/off switch for the refrigerator is on the 12-volt panel on the lower right side of the helm station. The fan works great. It keeps frost from forming on the cooling plate above it and keeps the air circulating in the refrigerator so the temperature stays uniform throughout.
_JPG.jpg)
This shows the 2-inch cutout under the refrigerator, with 2x4s on each side that the refrigerator slides on to support it. This really works well, and we seldom need to use the installed fan to cool the compressor.

I built a guard from plastic fencing so the fan would not be damaged by items stored in the storage area.

The Dometic refrigerator/freezer fits in the middle of the rear portside compartment in the cabin across from the head. The top is a large cushion that not only provides insulation but also serves as a seat.

The top/seat has been removed, revealing the Dometic. The DIgital display and controls are on the left. We always keep it set at 0 degrees Fahrenheit, and the temperature always stays very close to that. To the lower left is the white power cord, which runs about 2 feet and passes through the bulkhead into the generator compartment. To connect the Dometic, just plug in the end of the power cord with the black cord coming out of the Dometic.
The top is open on the Dometic, showing the storage inside. The basket is adjustable depending on what needs to be brought on the trip. The box that the Dometic fits in is made of GAF's "Energy Guard" Polyiso-insulated sheathing, R6, covered with Naugahyde, including the bottom. It is very energy efficient.
FRESH WATER SYSTEMS
The R-27 has a 40-gallon fresh water tank. The stock boat has a faucet in the galley and one in the head, both with hot and cold water. There is a raw water washdown on the boat, but I also wanted a freshwater outlet in the cockpit for rinsing off saltwater and general cleaning. I added a hose and a stainless-steel fixture adjacent to the raw-water washdown at the rear of the cockpit on the port side.
We wanted to use the boat's water for drinking and showers, so we installed a whole-house carbon filter that treats all the water from the 40-gallon tank. In addition, we installed a GE Exterior Refrigerator/Ice Maker Filter system and a faucet designed to mount next to the galley sink. Using that faucet, we filled a Britta water filtration pitcher stored in the refrigerator's outside door, so all water used for cooking and drinking was filtered 3 times. Britta and extra filters are included with the sale. Adjacent to the Britta in the refrigerator, we have 2 23-ounce Vapur collapsible water bottles that we fill from the filtered water spigot at the sink. That water is then cold, and when the Britta gets low, we fill it from the Vapor bottles, refill them, and put them back in the refrigerator. We mainly use the Britta to fill our drinking glasses, and we seldom, if ever, run out of cold drinking water. We try to keep the water tank full when we are not using the boat, but usually we sanitize it once a year. There are many ways to do that, and we have articles on it in the files that come with the boat. We have found that the 40-gallon tank lasts about a week to 10 days, depending on how many showers we take. We normally top off the water tank and pump out the holding tank at marinas when we take on fuel. If we stay in a marina, water is available at the slip, and we keep the water topped off. We have a clear 50-foot ⅝” water hose used only for filling up the 40-gallon water tank.

On the left is the black Johnson water pump in what is now the battery compartment.

In the top compartment next to the refrigerator is the GE Exterior refrigerator/ice maker filter. It is new as of May 2026.

At the rear of the portside cockpit are the black raw-water washdown and the stainless-steel fresh-water washdown we added.


Underneath the sink in the head is a whole-house carbon filter that is connected to the water pump, and all the freshwater used on the boat runs through it. There are two additional carbon filters and extra O-rings in storage under the dinette.

The smaller faucet on the upper left of the sink is connected to the GE filter and used for cooking and drinking water.

This is the Britta filtered water pitcher and 2 Vapur collapsible water bottles. There are 3 filters included for the pitcher.
The round gauge on the top right of the dashboard is the water level gauge, which is surprisingly accurate.
COCKPIT and SWIM PLATFORM
The cockpit is 8 ft x 12 ft. Inside it are 4 opening hatches: One is a combination step/hatch on the forward port side, containing the generator and all 4 main electrical switches, the main bus for the grounds, and other miscellaneous fuses. One, in the middle of the cockpit, is the engine compartment, which houses the engine, holding tank, macerator, raw water pump, and bilge pumps. The one on the rear starboard side houses the batteries, water heater, fresh water pump, battery charger, inverter, autopilot control, and trim tab control. There is a custom-made tool storage case with basic tools that fits over the batteries and can be removed relatively easily to access the batteries. The case has a large assortment of tools. Be sure to review the pictures to see what is included. One at the rear of the cockpit on the port side houses the 50-foot shore power cord, the Sta-Plug which is used to plug holes in the hull or plug hose or hull fittings that rupture, the pedestal that attaches just below the seat and holds the rear table, and the battery for the electric trolling motor used on the Portland Pudgy Dinghy, which, when not on the Dinghy, is wired in as an additional house battery.
In the middle of the rear of the cockpit is a raised platform built over the holding tank, used for the seat and backrest, and attaching the pedestal and table. The cushion and the backrest are stored under the dinette table when not in use. There is a tan L.L. Bean - 4’ x 4’ Waterhog carpet that fits over the engine compartment. It is designed to get wet and surprisingly dries out very quickly. There is also a nice boat deck mat with an anchor on it to put in front of the cabin door.
It also has a removable bin that holds a step, which attaches to mounts on either side of the cabin for roof access. We also store a one-gallon bucket, a long-neck funnel, two small mops, a large sponge, assorted hoses and nozzles, and anything else that needs to be stored out of sight. Under the removable bin is the holding tank with a Big Orange holding-tank filter and additional filter medium.
Under the step on the forward starboard side of the cockpit is an opening hatch providing access to a storage space primarily used for items related to the Portland Pudgy Dinghy.
On the swim platform, there is a storage box designed for a propane tank if you have a propane stove. Ranger Tugs seems to include a storage box on all its boats, even if the boat does not need propane. We keep our dock lines in the box, which includes 4 25-foot, 5/8-inch braided dock lines and 2 15-foot dock lines. Under the dock lines, we have an aluminum Danforth-type anchor designed to be disassembled for storage. It has its own nylon case and takes a few minutes to assemble. There is also 200 feet of ½ inch three strand nylon anchor line and 15 feet of 5/16 anchor chain. We never had to use it, but it felt good knowing we had it in case of an emergency.
There are 2 De-Fender Fenders, 8” x 20”. Engineered for versatility, the Defender features an end-to-end line passage that allows for easy horizontal or vertical hanging with a 5/8" rope, making it suitable for boats ranging from 25’ to 35’ in length. The rubber football needle valve makes inflation simple and reliable, keeping the fender at the recommended two psi for peak performance. They are stored in a 2-fender Windline Stainless steel self-storage fender holder mounted on the back railing of the swim platform.

The generator compartment is located beneath the port-side step, providing access to the front of the boat.

Black toolbox over batteries and the fluid storage box in the battery compartment in the starboard rear storage area.

The engine compartment is located in the middle of the cockpit.
.jpg)
The toolbox and storage box both opened up.

These are the items stored in the large left compartment of the toolbox included with the sale.

These are the fluids stored in the fluid storage box in the battery compartment included in the sale.


These are the items stored in the two smaller compartments of the toolbox included with the sale.

The autopilot controller is in the upper right, and the trim tab controller is in the lower right of the battery compartment.

This is the cockpit set up for entertaining. The backrest and seat are on the raised platform. The table is on its pedestal without the canvas cover, which we put on it while traveling. The L.L. Bean carpet is down, and the doormat has an anchor.
This is the rear portside compartment in the cockpit. Starting from the left is the stainless steel leg for the cockpit table, the 50-foot shore power cord in its white nylon case, the Stay-Plug, and the 70-amp dinghy/house battery.

This is the configuration for traveling. We always keep the canvas cover on the table, and the backrest and the seat stored under the dinette table.

This shows the stainless steel pedestal for the table. The electric trolling motor is mounted in its storage space on the starboard side of the cockpit and will be covered in more detail in the Portland Pudgy section.

This is the storage space under the seat. Beyond what you can see is the white canvas hose case behind the red pail and hose nozzles under the mop.

The green and clear hoses are stored in the space behind the seat.

This is a storage area used to house DInghy-related items and will be covered in more detail in the Portland Pudgy section.

We use the storage box to store dock lines, an extra anchor, an anchor chain, and an anchor line.

At the bottom are 200 feet of anchor line, a white nylon case, an aluminum Danforth, and anchor chain.
_JPG.jpg)
There are 2 De-Fender, 8"x20" fenders housed in a Windline stainless steel dual fender holder.

Windline stainless steel dual fender holder in its fold-up position when fenders are not present. It is easy to fold down and insert fenders.


These are the hoses and nozzles that are included.
_JPG.jpg)
This is the Big Orange filter mounted on the holding tank, accessible once the storage bin under the seat is removed. There is more carbon medium included, but not stored on the boat.

Included are 4 25-foot dock lines, an aluminum Danforth anchor, 10 feet of 5/16 chain, and a white nylon case.

On the top are the 4 25-foot dock lines.

De-Fender fenders showing the line. Each one has 16 feet of braided line. The fender on the left is set up to hang horizontally. It is necessary to tie a large knot in the line on each side, next to the fender, to hold it in position. To hang it vertically, use a single line.

Swim ladder in down position. Because it has four steps, accessing the swim platform is very easy.

This shows the full carpeting in place in the cockpit. It has only been on the boat twice since 2013, both times when we were entertaining guests, usually going to a restaurant in the area. It is beautiful, but it makes access to the rear compartments difficult during a multi-day cruise. We used the 4x5-foot carpet on cruises, which allowed easy access.
The swim ladder in its stowed position. The swim platform sits about 6 inches above the water, so if someone falls off the boat, it is easy to swim to the ladder, open the swim ladder cover, extend the ladder, and climb onto the swim platform.
PORTLAND PUDGY - 2010
Specifications
length 7’8”
width 4’4”
height 2’4”
weight 128 lbs
capacity 557 lbs (USCG approved for 4 people)
cockpit length 6’2”
cockpit area 16’1 sq. ft.
12.5 cubic feet of water-tight storage within the double hull
This has been a great dinghy for the R-27. It fits perfectly on the swim platform, and with the pulley system and Weaver Davits, it is easy to raise and lower. There are 2 custom-made stainless rods that hold it in place, along with 2 lines with snubbers to keep it in position in rough seas. It has a bow bumper and one on each side to protect other boats when we approach or tie up. This Dinghy is really tough compared to normal soft-sided dinghies. It has a double hull with 5 watertight inspection plates for access. There is a built-in compass mounted over the front seat.
The dinghy has four Weaver Davits, two of which came with it and were designed by Weaver Davits to fit the Portland Pudgy. One of the davits is attached to the front of the dinghy, and the other to the rear. They were designed so that, when inserted and the boat is tipped on its side, supported by the davits, the dinghy would fit horizontally across the swim platform or wherever it needs to be attached. Therefore, those two davits can be attached to any boat with no modification, but custom davits are needed, which Weaver davits would design for the boat to which they are to be attached. I had to do a number of measurements based on discussions I had with Weaver Davits. The Portland Pudgy is 7'8" in length, and the R-27 has an 8'6" beam. The davits I ordered had two mounts that had to be attached to the swim platform to insert and lock them in place. They had to be positioned properly so they did not interfere with anything already on the swim platform. In addition, it was necessary to make them the proper height so that, when attached, the Dinghy would lie flat on the water. Weaver Davits did a great job, but they were about $500. They would be inserted into their mounts on the swim platform when the dinghy needs to be transported, and kept on until the dinghy is removed and put in storage, at which time they would also be stored with the davits that go on the dinghy.
Sail Kit: Sail assembly consists of the sail, mast, gaff, boom, traveler, mainsheet, downhaul, and blocks. Custom sailcloth bag designed to store the entire sail assembly and tiller, and to fit in the double hull's storage space when the dinghy is anticipated to be sailed on a trip. They are stored in the garage when not in use.
The leeboards and rudder can be fastened under the seats with bungee cords if the Dinghy will be used with the sail kit on a trip. When not in use, they are stored in the garage.
We store the dinghy in a garage about 25 feet from the canal. It has a lifting bridle to hoist it up to the ceiling with a pulley system until the next trip. The pulley system can be included if the new buyer lives on a canal and wants to store the dinghy in the garage. We had a large Catamaran sailbot for 8 years with a 10'6" hard-bottom soft-sided dinghy that weighed 160 pounds. The boat could not be kept on a lift and was tied to the dock. We had a cover made for the dinghy, and it worked great. The pictures show the dinghy on the davits with the R-27 on the lift. We also have had the dinghy on the R-27 when trailering the boat. If I were going to keep it on the boat all the time, I would have a cover made for the dinghy. The green Sunbrella material we use to cover the sides of the boat when it is on the lift would work great and look nice. The dinghy is no problem when staying in a marina.
The Weaver Davits are stored in a compartment in the rear cockpit, along with the pulley system, tension lines, and towing bridle, until needed. The 2 stainless steel support rods that support the dinghy in an upright position, after pulling the dinghy up with the pulley system, are stored off the boat in the garage until needed, along with the dinghy’s two side bumpers and the front bumper.
The Electric Trolling Motor is a MotorGuide Great White saltwater-ready 46-lb-thrust trolling motor with 5 forward and 2 reverse speeds. The battery is a Walmart Marine Deep Cycle AGM, 75 A. An 8-gauge TRAC Outdoor Connector Kit is connected to the battery via a terminal. There is a separate terminal that connects to the wiring on the boat's house battery bank, and another terminal that connects to the trolling motor's wires. This makes it easy to connect and disconnect the battery from the boat wiring to the trolling motor. When the battery is not in the dinghy for use with the trolling motor, it is connected to the house bank, recharged, and used as an additional battery. The trolling motor is stored on a mount on the starboard side wall of the cockpit when not in use (see pictures). The motor includes a 3-foot stainless steel security cable and a padlock to secure it to the dinghy and to the storage mount.
A 3-foot LED waterproof nav light and a handheld bilge pump are stored within the double hull. A 15-foot stainless steel cable and padlock, stored in the double hull to attach and lock the boat to the swim platform and any dinghy dock when going ashore and leaving the dinghy.
Sesamee solid brass resettable Keyless padlock (2) for use with trolling motor and Dinghy stainless steel cables.
A 2.2 lb Lewmar Bruce-type anchor with 3 feet of ¼-inch chain and 40 feet of 3/8-inch triple-braid line in a custom storage bag. We keep the bag in the storage box on the swim platform and throw it into the boat if we think we will need it.
Two aluminum 2-piece oars that are 6’6” when assembled and designed to be stored in the double hull until needed.
It is recommended to search for "Portland Pudgy" online for the most up-to-date information; the model has not changed. It can also serve as a lifeboat by adding a cover and other accessories, available from Portland Pudgy.

This is a Great White Egret resting on the Portland Pudgy. This is a good picture of the boat with the dinghy ready to head out cruising. The two lines that cross behind the American flag, with black snubbers in the middle, are used to keep the Dinghy in position even in rough weather.
_JPG.jpg)
The dinghy is in the up position with the rods connected and the pulley is getting ready to be removed from its lifting point next to the door.
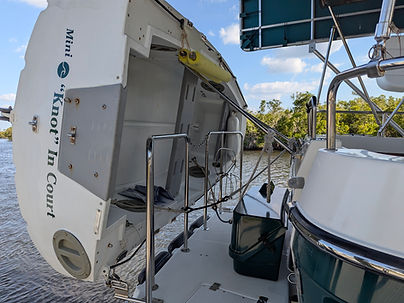
The dinghy is on the lift with the 2 lines with snubbers not yet connected to the cleats to hold it in position in case of rough seas. Once the boat is in the water and ready to go, those will be connected. The dinghy is sitting on the davits, which are connected to the swim platform.
_JPG.jpg)
The two stainless steel poles are attached to the dinghy and the back of the boat. These are locked into position once the dinghy is pulled up. The two lines at the top are connected to 2 stainless steel rods that pass through the Weaver davit holes at the top of the dinghy. We only use the bottom holes in this case, as that is how the dinghy is positioned. Once the dinghy is in position to connect the stabilizing rods, the line on the pulley is cleated and the rods connected. The pulley is then loosened, and the rods running through the top of the dinghy are disconnected and removed, along with the pulley, and stored until the dinghy has to be lowered and the process is reversed.
_JPG.jpg)
The rods are attached to the boat and can move up and down, but are not meant to be removed. The fasteners to the dinghy are removable. Before the dinghy is lowered into the water, the pulley system is reattached, the rod detached from the dinghy, and the dinghy lowered. Once lowered, the rods are raised and bungeed onto the steel railing until it is time to raise the dinghy again.
_JPG.jpg)
This is the mount for the weaver davit attached to the swim platform.
_JPG.jpg)
This shows the davit inserted in the mount. On a trip, that davit will remain inserted until the trip is over and the dinghy is back in the garage. The davit connected to the dinghy is removed when the dinghy is in use and reinserted to mount the dinghy on the davits for transportation.
_JPG.jpg)
Most of the time, we use the dinghy on trips; the electric motor is used. Almost all anchorages are no-wake zones, so we travel at the same speed as the gas-powered dinghys. With the large 70-amp battery, it runs for hours.

When going to the beach, we pull the motor up and lock it in position, and the dinghy slides easily over the sand.
_JPG.jpg)
The nice thing about weaver davits on the Portland Pudgy is that when you arrive at a large anchorage and want to sail, lower the dinghy into the water but keep the davits connected. It then stays stable and makes it much easier to get the dinghy rigged and ready to sail,
_JPG.jpg)
I think I am trying to untangle the rigging, but it is a good picture of the leeboard underwater.

A good friend sailing for the first time had no problems.

Dinghy pulled up to the 10-foot ceiling rafters with a pulley system. Designed so that the garage door, when opened, goes under the dinghy.

All the accessories are stored in the boat before the boat is raised to the rafters.

The transport wheels have been attached to the transum. The small wheels on the keel are adequate for moving the dinghy on concrete but not on grass. I need to move the dinghy about 50 feet across the grass before getting it to the dock to put it in the water.
I move the dinghy out of the garage onto a concrete paddock and then flip it over. I then hook the two handles on the lines at the top of the dinghy, lift the front up, and push it to the dock. I reverse the process when returning it to the garage. The oars are stored in the hull through the inspection port. They are kept there at all times, even during storage, unless needed.
_JPG.jpg)
The dinghy is on the lift, where it might be stored for weeks at a time between trips.
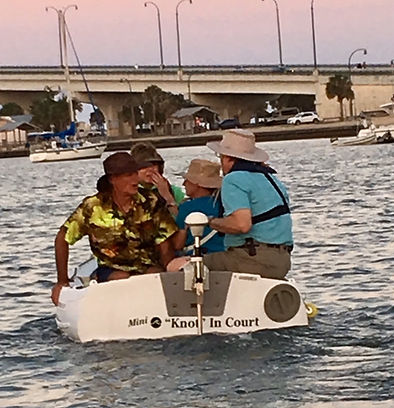.jpg)
We had four people on board and still had a lot of freeboard to spare.
_JPG.jpg)
At a dinghy dock, we always raise the motor out of the water and disconnect the electricity. At the rear of the boat, we set an anchor to keep the dinghy from going under the dock. There is a front bumper and two side bumpers to keep the boat from damaging other boats when going alongside.
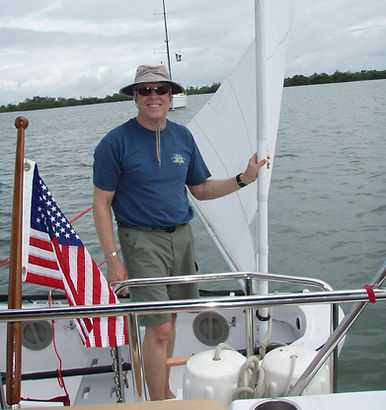_JPG.jpg)
Mission accomplished!

When sailing, it is best to sit on the boat's floor.

The dinghy 1/2 way up with a pulley system.

These are a lot of the accessories for the Portland Pudgy. On the bottom left are the rudder, 2 leeboards, the sail in its case, 2 stainless steel support poles for the dinghy when it is on the davits, a handheld bilge pump, and 2 oars. The paddles separate from the handles for storage through the rear access hole in the dinghy. Starting at the top left is the white front bumper, and the 2 yellow side bumpers. On the other side of the sail case is the 3-foot LED waterproof nav light and its white case. Directly above those are 2 handles with yellow stripes used when transporting the boat upside down with the large transport wheels.

The compass is built in at the front of the dinghy.

The front port-side inspection hole has a 15-foot stainless cable and lock in a nylon bag, and another nylon bag that holds a plastic jar which holds a title card, a prop remover, and extra shear pins.

The rear port inspection hole holds the 3-foot LED waterproof light and the handheld bilge pump.


This is the 2.2-pound Bruce knock-off anchor, 3 feet of 1/4 inch chain, 40 feet of 3/8 triple braid line, and the carying case.
This is the anchor storage bag that is kept in the box for the lines on the swim platform.

Starting at the top right is a bag that holds the pully system to pull up the dinghy. To its right is the weaver davit for the rear of the dinghy. Next are 2 identical Weaver davits mounted on the swim platform, followed by the 2 lines with black snubbers. The bottom left has a line for tying up the dinghy, followed by the bridle that hooks onto 2 stainless steel eye hooks on the front of the dinghy. In the middle are a bunch of black bungee cords to fasten the rudder and leeboards to the underside of the seats when traveling with the sail kit.

This is the rolled-up sail, and its nylon case.


This is the forward starboard compartment where the lines, pulley system, and weaver davits for the dinghy are stored.
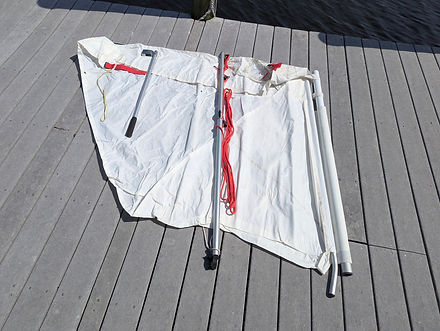
Unfolded sail with boom and rudder handle.

Sail spread out, ready to be installed on the dinghy.
Brickerton Folding Aluminum Bikes
Two Brikerton Folding Aluminum Bikes and their cases are included with the sale. They fold up easily for storage in very tough nylon carrying cases. They are stored on the boat, on the roof at the rear of the cabin, underneath the solar panel. They weigh 21 pounds and are easy to tie down with bungee cords thanks to the numerous fastener points on the cases. These bikes were originally manufactured in England in 1971. Then in Australia in the late 70’s and early 80’s, then back to England until 1991. About 450,000 were manufactured over 20 years. Our bikes, as far as I can determine, were manufactured in the mid 80’s and are the most common model. They have a 14” front wheel and a 16” rear wheel. They have a 5-speed derailer, and in low gear, it is easy to pedal even on relatively steep hills. Being made out of aluminum, they are a little shaky and need some practice to get comfortable. The bikes are fully adjustable for all body sizes. These are not designed as touring bikes for long-distance riding. By and large, they are best suited for short distances and are commonly carried in boats, airplanes, and motor homes for use upon arrival at your destination. It takes about 5 minutes to fold up and put it in the case, or remove it from the case and set it up. We used them in marinas, and they really came in handy for getting places while exploring or destination shopping.
We set the bikes up so that when you were on the seat, both feet could touch the ground. It shifts easily from one speed to another depending on the terrain. We never try to stand up and pedal; instead, we stay seated while riding. After a short period of time, you will be very happy with how enjoyable it is to ride. We never found it necessary to lock the bike up when shopping or sightseeing and never had a problem. In the marina, we would keep it on the dock near the boat, and theft was never an issue. Even though they are small, folded up, and in the case, we never took them in the dinghy to use on shore. When we went shopping, backpacks were far superior to trying to tie something to the bike.
There are many YouTube videos to watch, not only about the history of the bike but also, operation-wise.

One of the two Brinkerton Bikes, along with the heavy-duty nylon carrying case.

This shows the pedal reversed and now tucked in, rather than sticking out. There are reverse threads on the bolt attached to the pedal to prevent it from coming loose while pedaling.

Keeping the wheel straight, loosen the two black clamps that controls the handle bars. Move them 90 degrees to the tire and lower them.
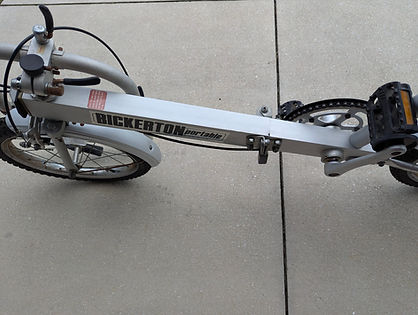
Between the pedal and the front wheel, on the side of the square aluminum tube, is a lock that needs to be released so the square tube can be folded in.

The bike is folded together, and the seat has not been removed from its tube.

The bike is folded up and sitting in its case just before it is zipped up.

The first thing to do before folding up the bike for storage is to reverse the left pedal. It was designed to be unscrewed from the pedal shaft, reversed, and screwed in on the other side of the shaft so that it no longer suck out.

Loosen the two clamps where the handlebars can be adjusted, where they enter the larger tube. Have them point toward each other and align with the bottom of the tire.

The lock is in the open position, and the bike is ready to fold in half.

The seat and tube have been removed and repositioned so that they lie flat and do not stick up.

The bike in its case and ready to be put on the boat.
TRAILER
The trailer is a 2014 Float-On model 1231ABB. It is a tandem-axle, aluminum, bunk-style unit designed for larger, heavier vessels, such as 27-foot Ranger tugs or boats weighing around 9,000 to 10,000 LBS. These trailers are manufactured by Float-On Corp, based in Vero Beach, Florida, and are known for their saltwater-resistant aluminum I-Beam construction. We upgraded to include all-stainless-steel hardware. It weighs 1274 LBS and is 35 feet long. It has a tandem axle with torsion-bar suspension and electric disc brakes. The bunks are carpet-covered aluminum. It is designed for “float-on” retrieval, where the boat floats onto the bunk system. The R-27 has a tunnel drive and only drafts 2’2”, which allows you to motor the boat onto the trailer with the engine and not worry about the propeller hitting the ground or the trailer. Every launch ramp is different, and about 25% of the time, it is not possible to float it on, so it is nice to have the option to motor it on.
The Gross Vehicle Weight Rating (G.V.W.R) for the trailer is 11,274 LBS. The boat's dry weight in the specifications is 6,200 LBS, but that is “bare bones”, without a generator, air conditioner, Dometic refrigerator/freezer, extra battery, or other accessories that are on our boat. We figure our boat weighs about 7,000 LBS before fuel, water, or the contents of the holding tank are factored in. When trailering, we make it a point to have an empty holding tank, less than ½ tank of fuel, and 20 gallons of water. The weight of the boat would be between 7,500 and 8,000 pounds, which, together with the trailer, is substantially less than 10,000 LBS. We have pulled it 10,000 to 15,000 miles with a ¾-ton 2004 Chevrolet Avalanche with 72,000 miles and an 8.1-liter (496-cubic-inch) engine, and it runs without issue. The Chevy Avalanche is not included, but we would be willing to sell it.
I always carried the tools I needed to repair the trailer, and they are all included. There is even a Sherline Trailer Tongue Scale, which I used to set the tongue weight at 700 LBS. It pulls nicely with that amount of tongue weight. There are two spare tires mounted on the front disk brake rotors and hubs near the front of the trailer during a trip. We never had any issues with the hubs, but if one fails, the entire new hub-and-disk brake assembly can be bolted directly to the trailer. All the tools, wrenches, and sockets are included to do that. When not on a trip with the trailer, the spare tires are stored in the garage.
We have a lot of friends with trawlers that, lengthwise, may be only 5 feet longer, but the beam will be 10 feet or more, with a weight well over 12,000 LBS. The R-27 has a beam of 8’6” and no special permits are required for trailering the boat. The tow vehicle issue becomes a real problem because of the larger boat's weight. The vehicle needed will be a 1-ton pickup with dual rear wheels and a large diesel engine. Financially, the larger truck is a big deal, not to mention the required permits and, in some cases, a vehicle in front of the truck and one following with appropriate signage. The long and the short of it is none of our friends can trailer their boats. One real benefit is being able to pull the boat out of the water for maintenance or, more importantly, during hurricanes. It is far easier to wax and buff the boat, change the prop and thruster zincs, apply bottom paint, and perform other maintenance when the boat is in your driveway. You will see pictures of the boat tied down in preparation for an approaching hurricane.

This picture is taken in a rest area somewhere between Florida and Minnesota. I like this picture because it shows how level the trailer is in relationship to the ground. The trick is having the correct trailer hitch. Prior to the R-27 we had a 25 foot Bayliner classic cruiser we pulled with the same vehicle. It also had an 8'6" beam, a different trailer and was substantially lighter. I had a 10,000 LBS hitch which I kept after selling the boat. That hitch did not work because this trailer has torsion-bar suspension and sits closer to the ground. I am including both hitches with the boat and one of them should work depending on where the 4" dock for the hitch sits on a different truck. This boat is set up for a 700 LBS tongue weight so it would not need to be changed unless you change how the weight in the boat is distributed.

The boat is in the driveway, making it much easier to wax and do other repairs.
_JPG.jpg)
Spare tires mounted on disc brake rotors and hubs on front of trailer

Spare trailer tires in their storage space in the garage.

The chain runs through the wheel and is locked around the frame.

These are the 2 trailer hitches that come with the boat. They are both rated at 10,000 LBS. The one on the left is used on the present truck and is flipped over, raising the ball about 4 inches above the 4" trailer dock. The other hitch raises or lowers the ball much less than the other. Between the two hitches, one should work no matter what vehicle you have.

A new tail light is included in case one gets damaged

There are only 2 socket sizes and wrench sizes necessary to tighten or remove the nuts and bolts on the trailer: 9/16 and 3/4. If a disc brake rotor and hub fail and need to be replaced with one that holds the spare tire, then a 1 1/2-inch socket is necessary.

The wheel chocks are too large for the plastic bin, so we store them in the truck bed until needed. The grease gun is necessary for adding grease to the bearings while traveling. We always carry an extra tube of grease. The crescent wrench, pipe wrench, and screwdrivers come in handy for repairs.
_JPG.jpg)
The boat is tied down with anchors and a chain in preparation for a hurricane.
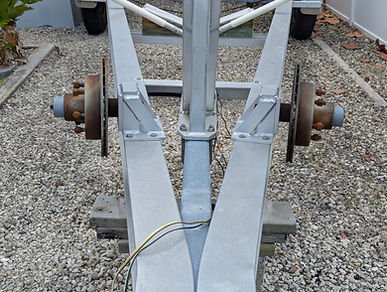
Disc brake rotors and hubs on the front of the trailer after tires are removed for storage.

Trailer hitch coupler lock, and ball lock.

Electronic brake pump with battery back-up and electronic brake controller in the truck. This is much better for towing a boat of this size than surge brakes and was an upgrade.

This is the plastic bin that we carry in the bed of the pickup truck when trailering the boat. In the pictures that follow, we will go into detail about what is in the bin.

Two extra grease-bearing caps are in with the wrenches.

The 3/8 ratchets are for the sockets. There are 9/16- and 3/4-inch wrenches, along with two 1/2-inch wrenches, to adjust the boat's rear guide poles. The Sherline trailer tongue scale and two trailer hitch lockable pins, with keys are included.

The tie-down strap on the left goes through the bow eye on the bow of the boat. The heavy-duty winch support has a triangular hole near the bottom that the plastic hose fits through, and then the retainer is tightened. The other two tie-down straps are attached to the rear of the boat and then to the trailer, and it is obvious where they attach.
Miscellaneous Included Items
The majority of items included in the sale are stored on the boat. Most of the additional items are small and will be explained in the pictures that follow.
We had a 10,000-LB boat lift, which would handle our size boat. The support bunks we had for the Bayliner were 2x8 inches and 12 feet long, with attachments to lift, but not designed to support R-27. Therefore, we ordered the new bunks to be 3x10 inches and 12 feet long, with a heavy-duty support platform. They are just like new, and if you have a lift, you can have them as long as you or someone else remones them. They will fit right on your lift as they are all the same size, unless it is made for a huge boat.
We are also including the 3 pieces of Sunbrella for the front, side, and back of the boat. The side and front are in good shape, but the back has been repaired and will eventually need to be replaced. The nice thing is that the cover can be used as a template, making the work much easier.
The other item that you may or may not want is the many paper charts we have from the Keys to Tarpon Springs, and across Lake Okeechobee to the east coast. We even have a set for the panhandle from Mobile to Carrabelle. In 2006, we sailed and motored our 35-foot Island Packet Catamaran on a two-week adventure from Niceville all the way home. If you decide to take the R-27 up there, I suggest the trailer. It would be easy to spend three or four weeks up there exploring, and many marinas will let you store your boat and trailer if you agree to stay a night or two.
The additional items will be covered by pictures. As time passes, I am sure that there will be more items to include.

These are the heavy-duty bunks that were discussed above. The R-27 fits great on a normal 10,000-LB lift. It is only 8'6" wide, and there was enough room to add a Werner walkway to each side of the lift. It makes it very easy to wash the hull and apply wax.

The Dometic refrigerator/freezer would have to be removed from its case to need these

We never used the instrument covers as all instruments are inside the cabin.
There is a separate hydraulic oil for the steering that is in the fluid container in the battery compartment. This is to be used for the Bennett trim tab hydraulic power unit in the battery compartment.

There is enough charcoal to change it twice.

All 3 of the additives are excellent. We usually add per directions every time we take on Diesel. The bilge cleaner is very good; we no longer need it.

The macerator is new and has never been used. There are repair parts that will fit the Macerator that is installed or this one.

One prop zinc and 5 thruster zincs, along with allen wrenches for the thruster zincs, and extra parts are kept off the boat.

I was going to use this bilge pump water pick-up in the rear thruster compartment. I was going to hook it up to a small diaphragm bilge pump and mount a water sensor unit on it, but I never got around to it. It is not really necessary but would probably work.
MANUALS
It is very important to find a manual to troubleshoot a problem that arises during a cruise. Over the years, I have kept all the manuals and information that I felt might be needed. I organized those into folders with related items and labeled them so they would be relatively easy to find. I used blue painter's tape with handwritten notes as to what was in each folder. When we decided to sell the boat, I went through all my files and easily doubled the number of manuals I felt the new owner should have on hand. I decided to go from handwritten notes on blue tape to a legible typewritten sheet of paper for each folder. I titled each folder, followed by a list of the manuals or information it contains.
Here is the list of the 12 folders and their titles:
Appliances
Electronics
Generator
GPS and VHF Manuals
Miscellaneous Manuals and Info
Plumbing Manuals
Portland Pudgy
Radar, Sonar, and Autopilot
Ranger Tugs R-27 Factory Owners' Manual
Thrusters, Trim Tabs, and Windlass
Trailer
Volvo Penta D3-200
There is a picture of all of the completed folders on a table. I also included a picture of all of them in a heavy-duty nylon Ranger Tugs briefcase.


We always used this Ranger Tugs heavy-duty nylon briefcase to store all the folders containing manuals and other information we might need to solve a problem that could occur during a cruise. All 12 of the folders are in the briefcase, which we zip up and store next to the Dometic freezer at the rear of the cabin
This is a picture of the 12 folders that hold all the manuals and information on each topic. It is well organized and makes it easy to find what you are looking for.